Learn to sew cozy cat beds for shelter pets!
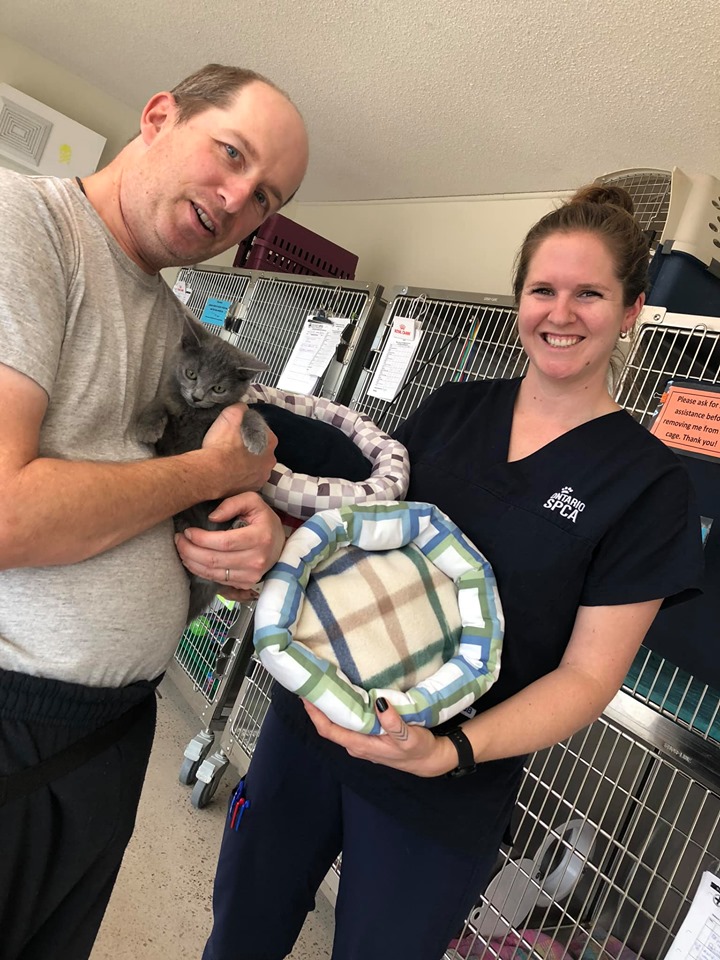
At the beginning of November 2019 we gave a shoutout to Denis, a volunteer instructor at the Pembroke Public Library, who was busy with his sewing class students making cozy beds and privacy curtains to help keep the cats at the Ontario SPCA Renfrew County Animal Centre comfortable and happy.
Your response was incredible! Many of you asked if he would share a pattern so that more of you could make a donate these cat beds to our centres. Denis has graciously given us this highly requested pattern for you to follow. It’s time to get sewing!
Pet bed instructions
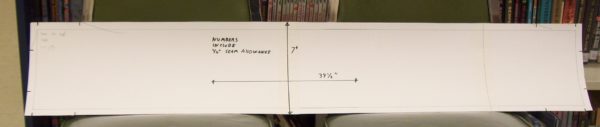
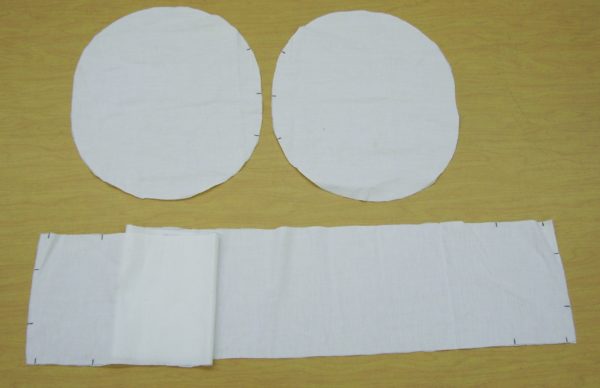
Pattern Pieces: Dimensions: Rectangle 7” x 39 1/2” Incl. seam allowance.
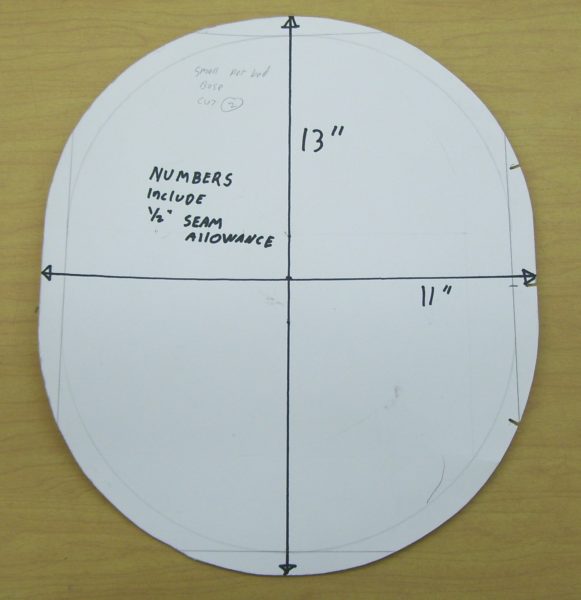
Oval 13”x 11” Incl. seam allowance
Step 1
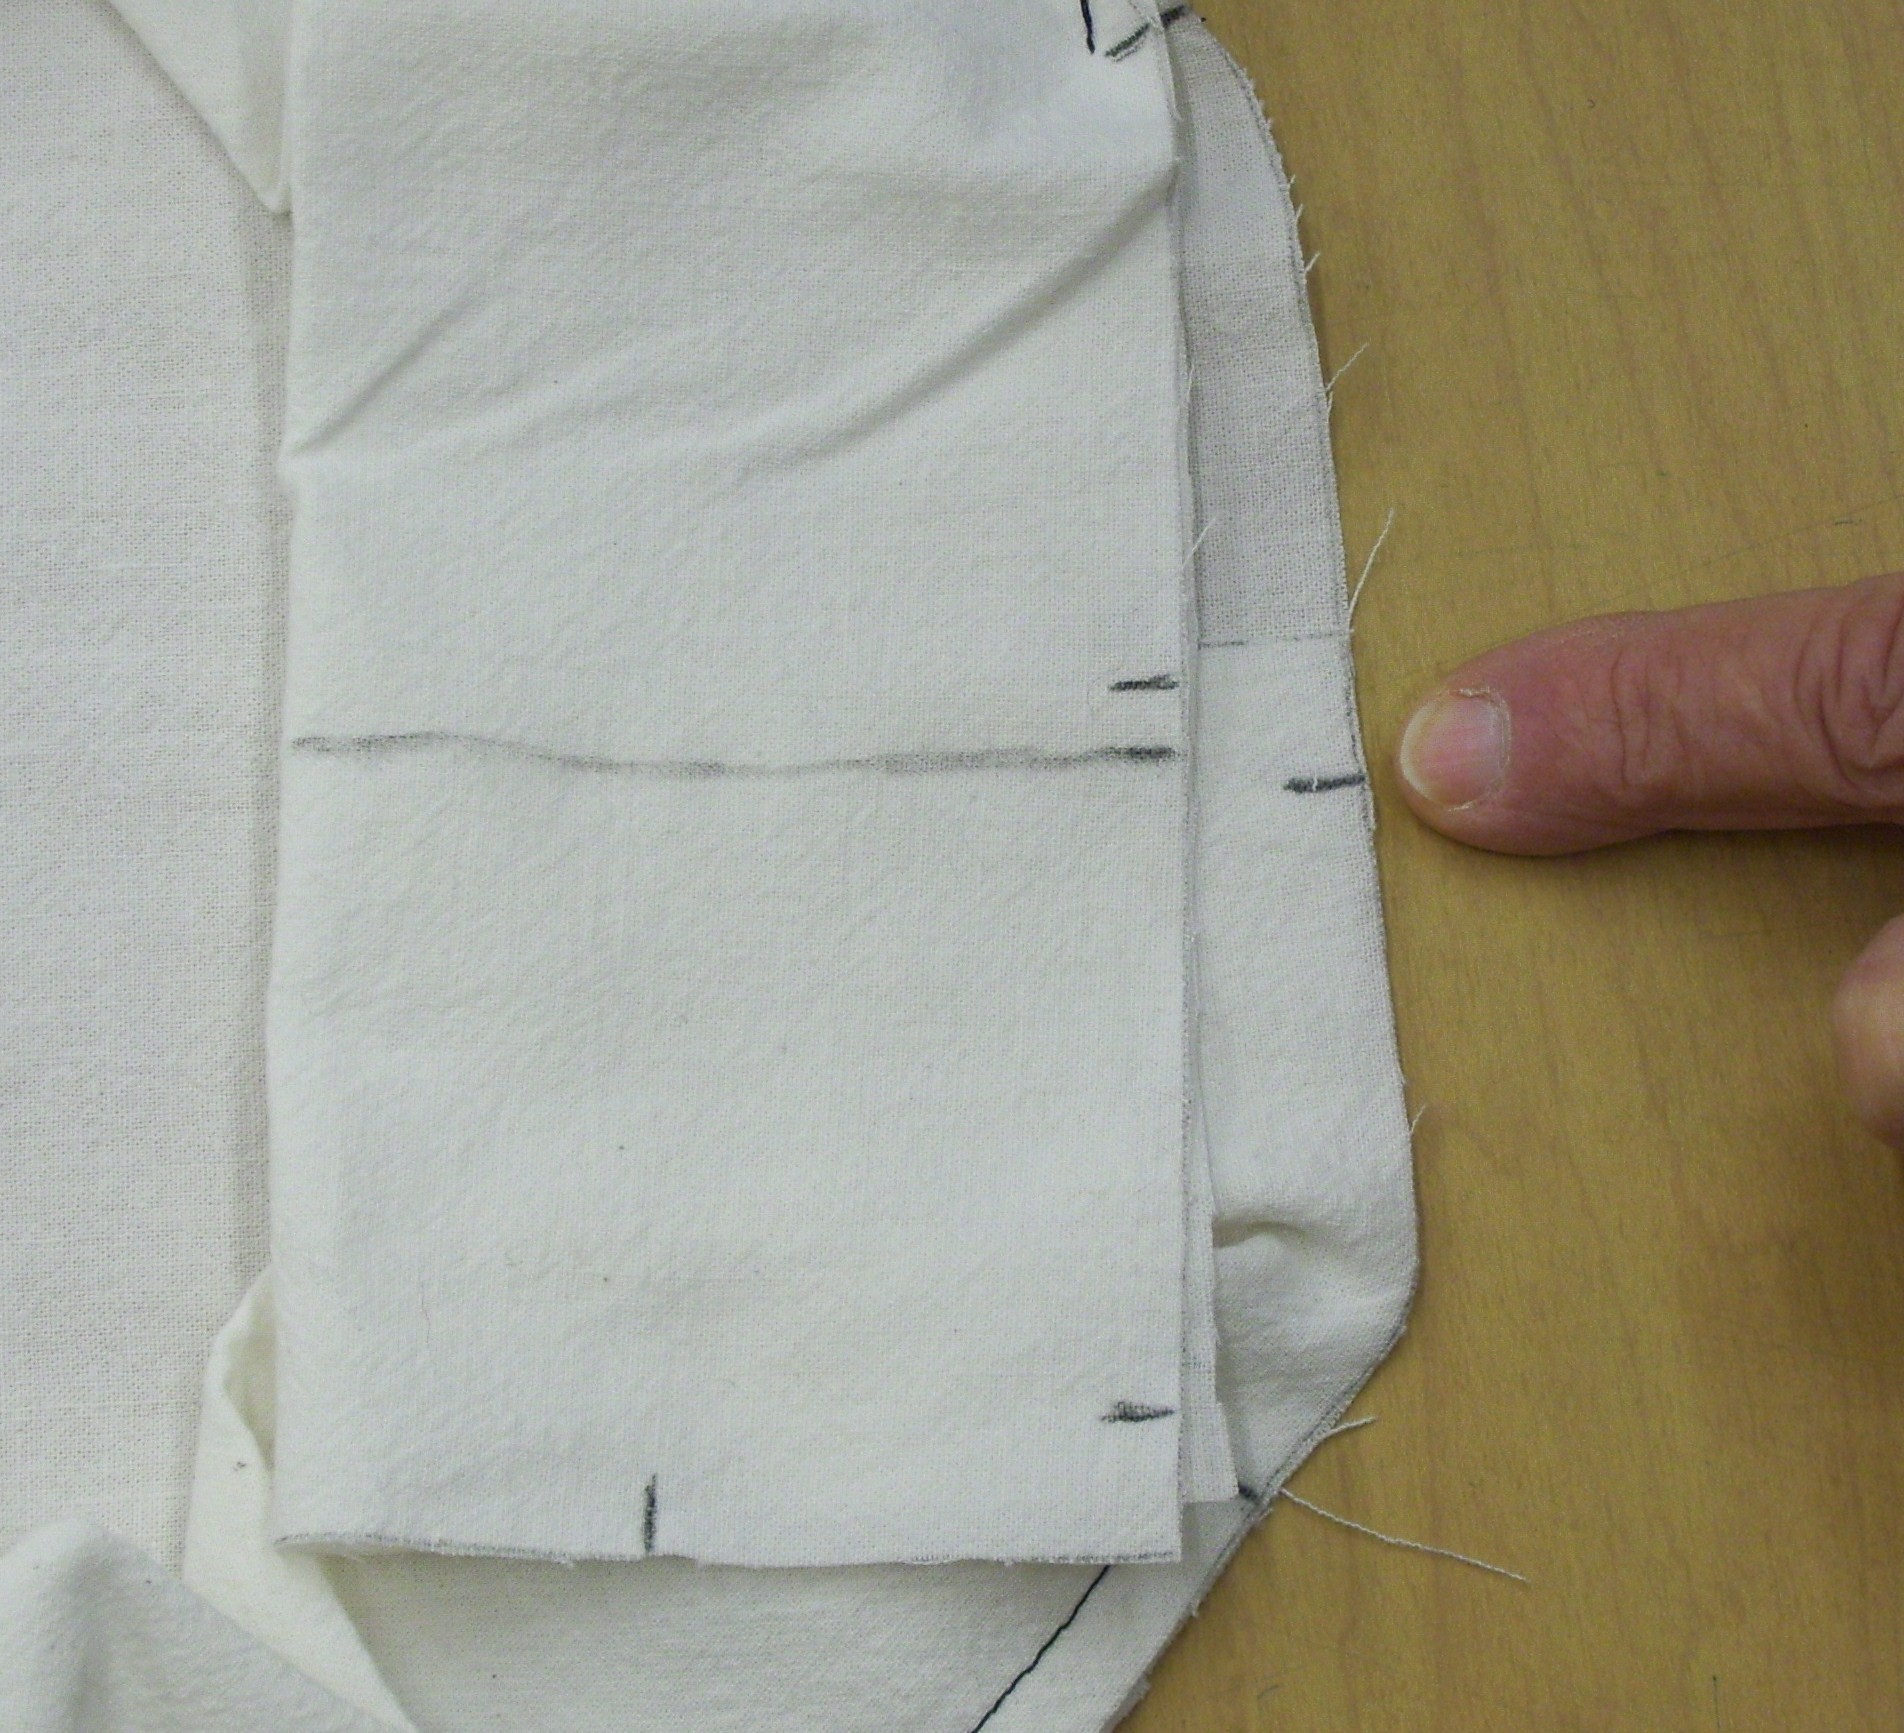
1.Mark and cut out two oval pieces and one rectangular piece in whatever fabric you choose to use, make sure you mark all notches.
Step 2
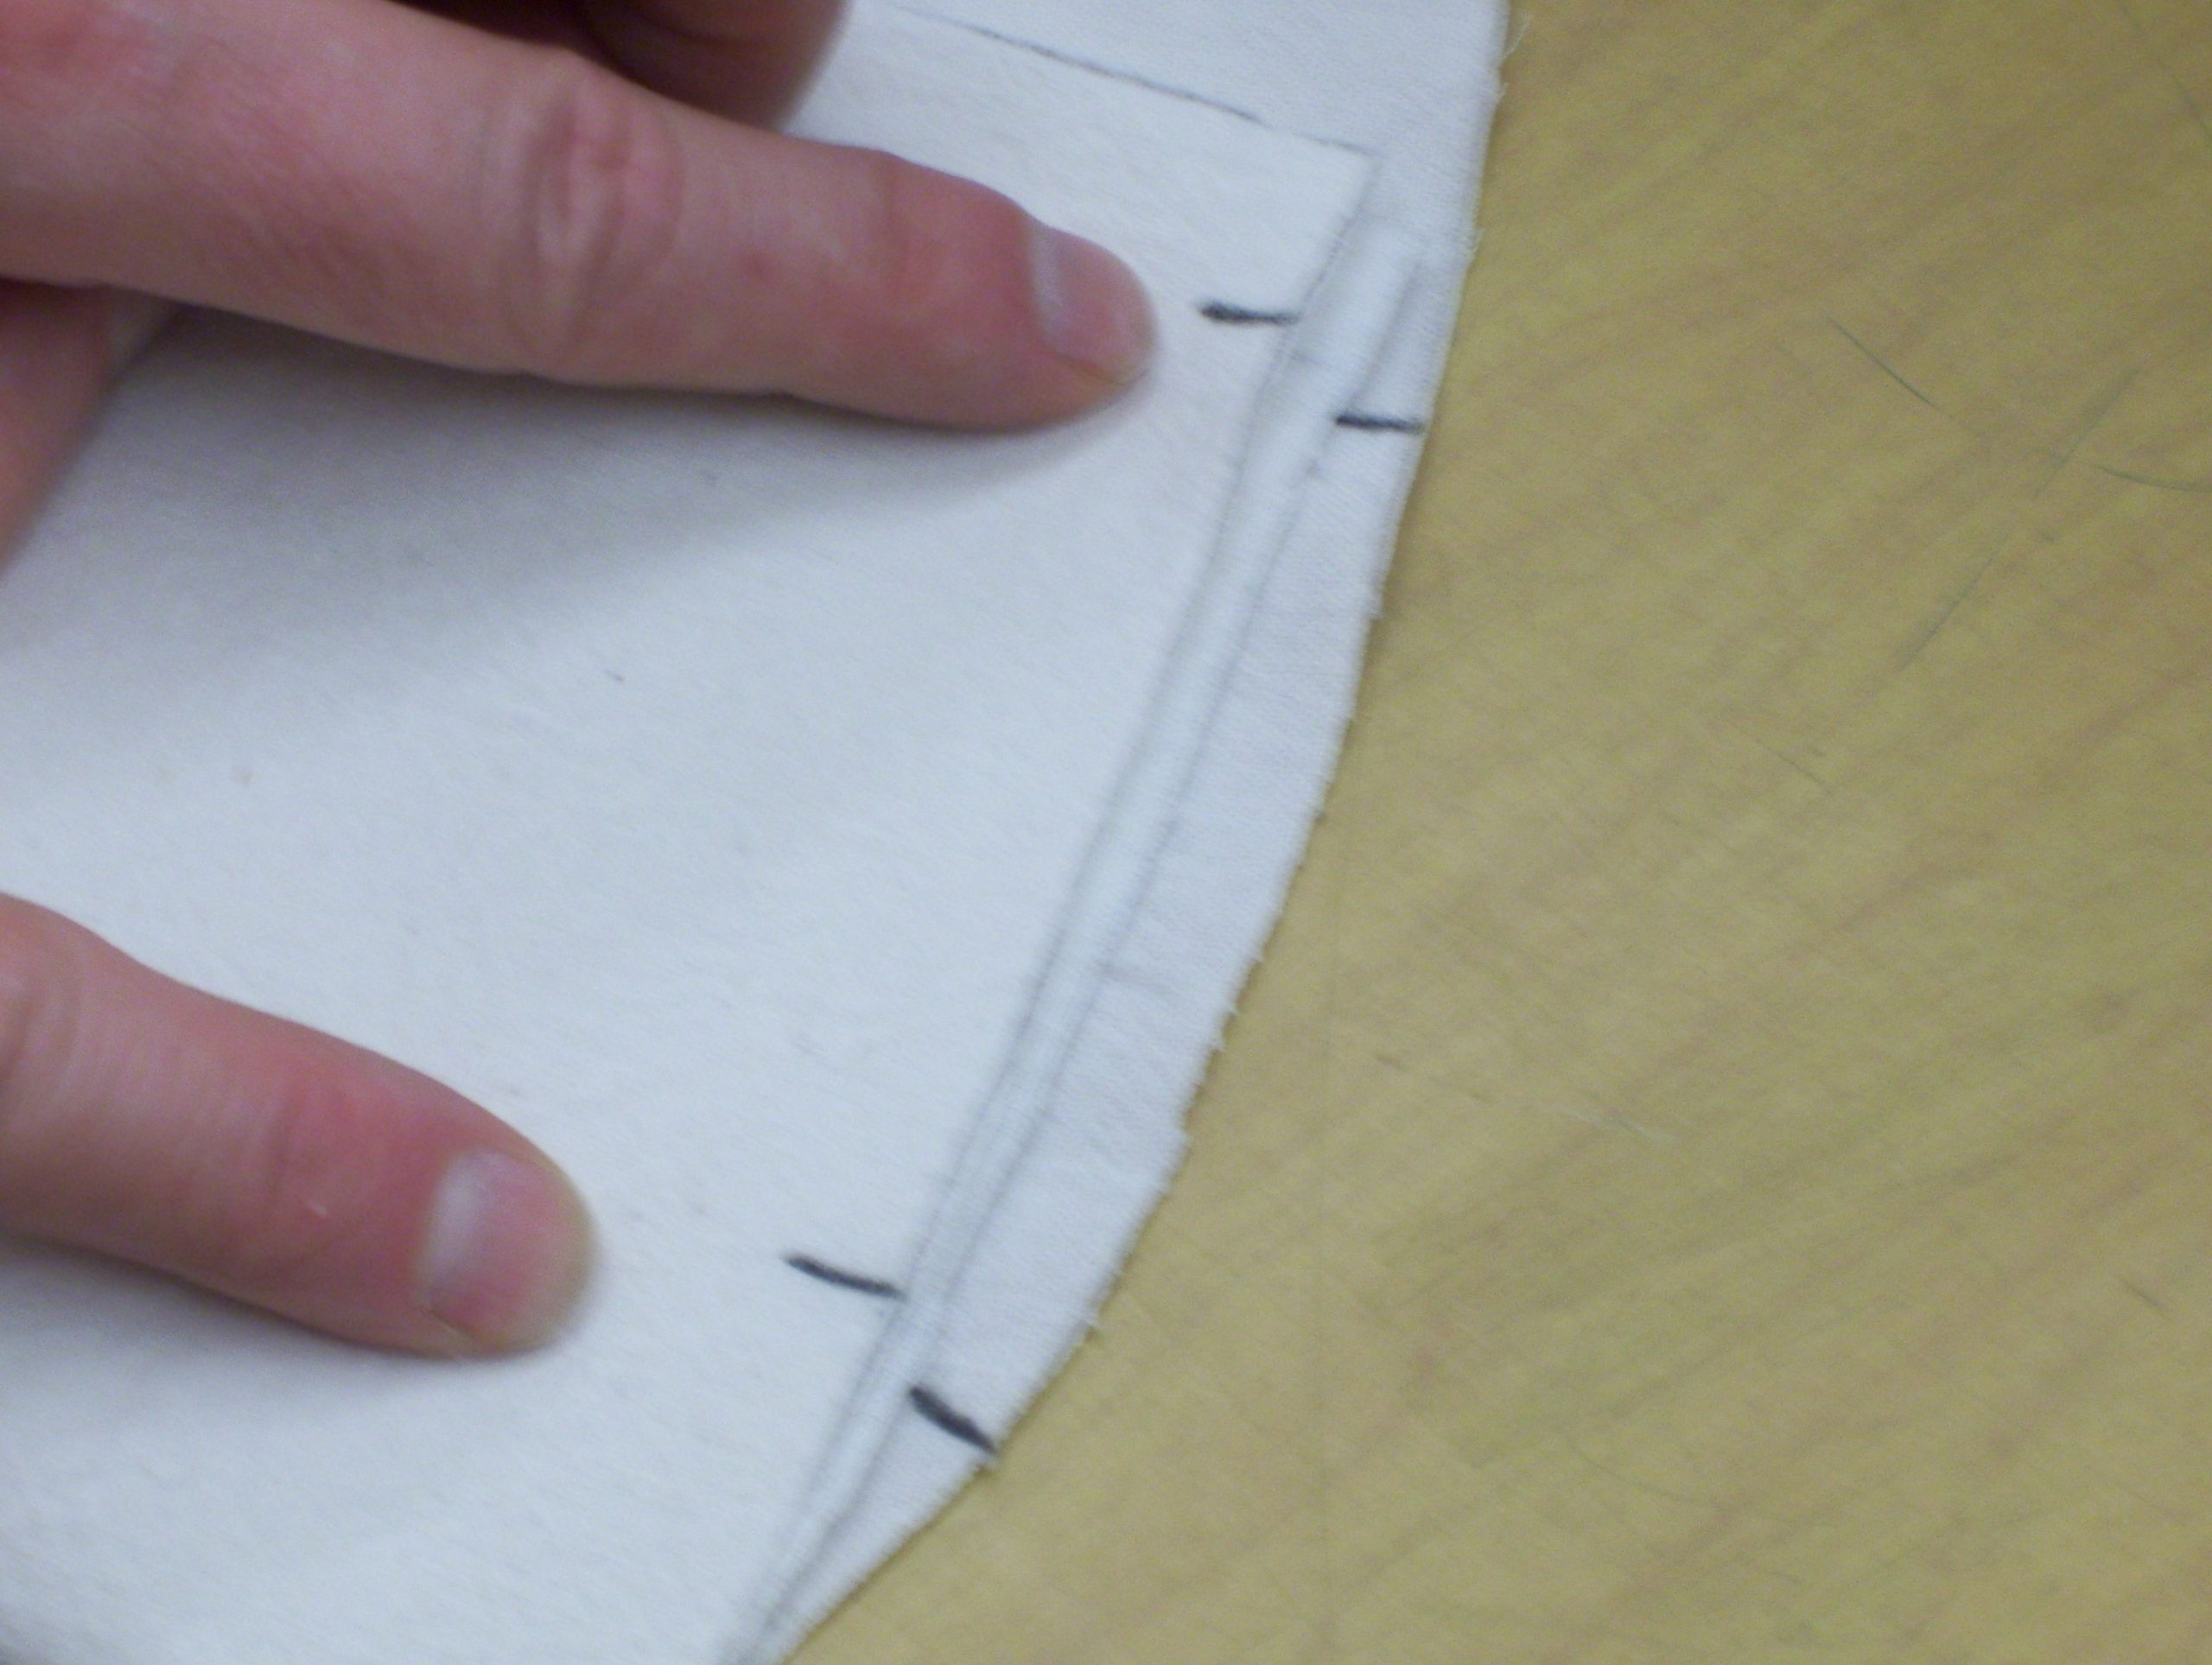
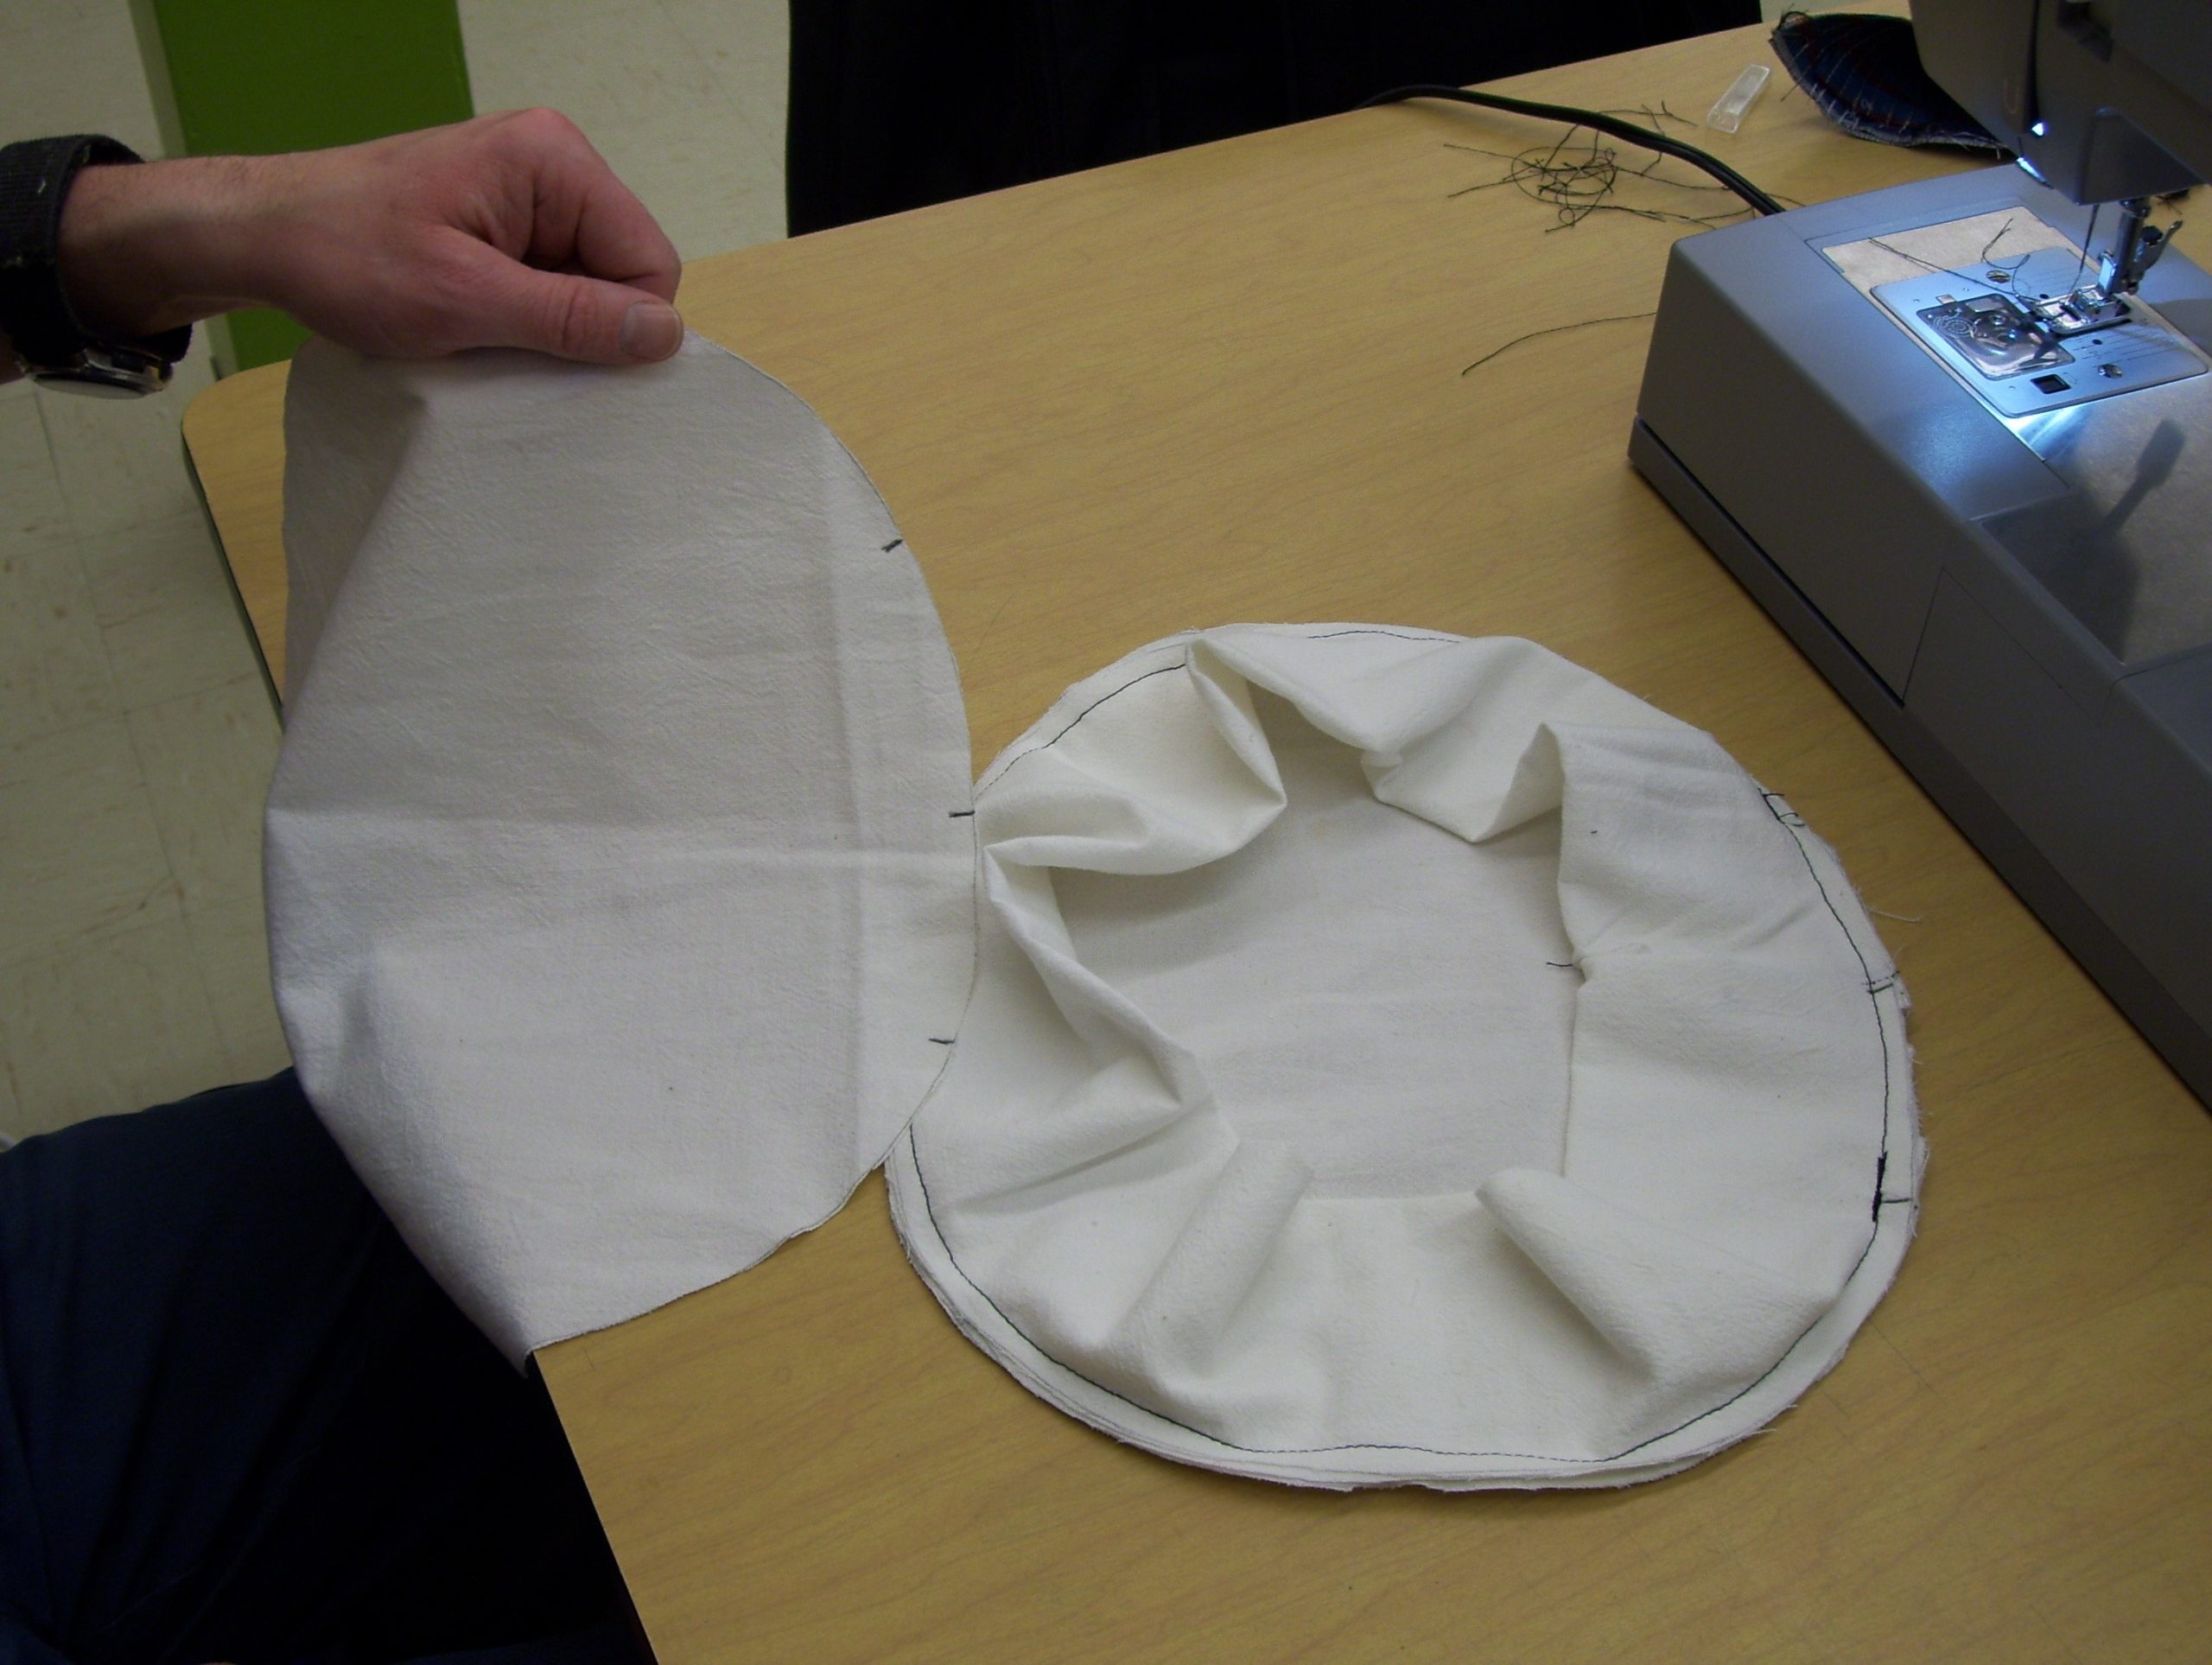
2.Begin sewing rectangle to oval that will become the bed top as follows:
- First fold the rectangle in half along the longest side
- Locate notches on rectangular piece that is 3” from the end (it doesn’t matter which end you use first)
- Place the notch against the notch on the oval that is beside the centre notch closest to you, make sure you can still see the notch on the other side of the centre notch
- Make sure that the folded side of the rectangle is laying towards the inside of the oval
- Start sewing using a ¼” seam allowance, make sure that you are attaching both rectangle edges and the oval edge
- Once you have reached the notch on the oval that is on the other side of the oval centre notch stop sewing
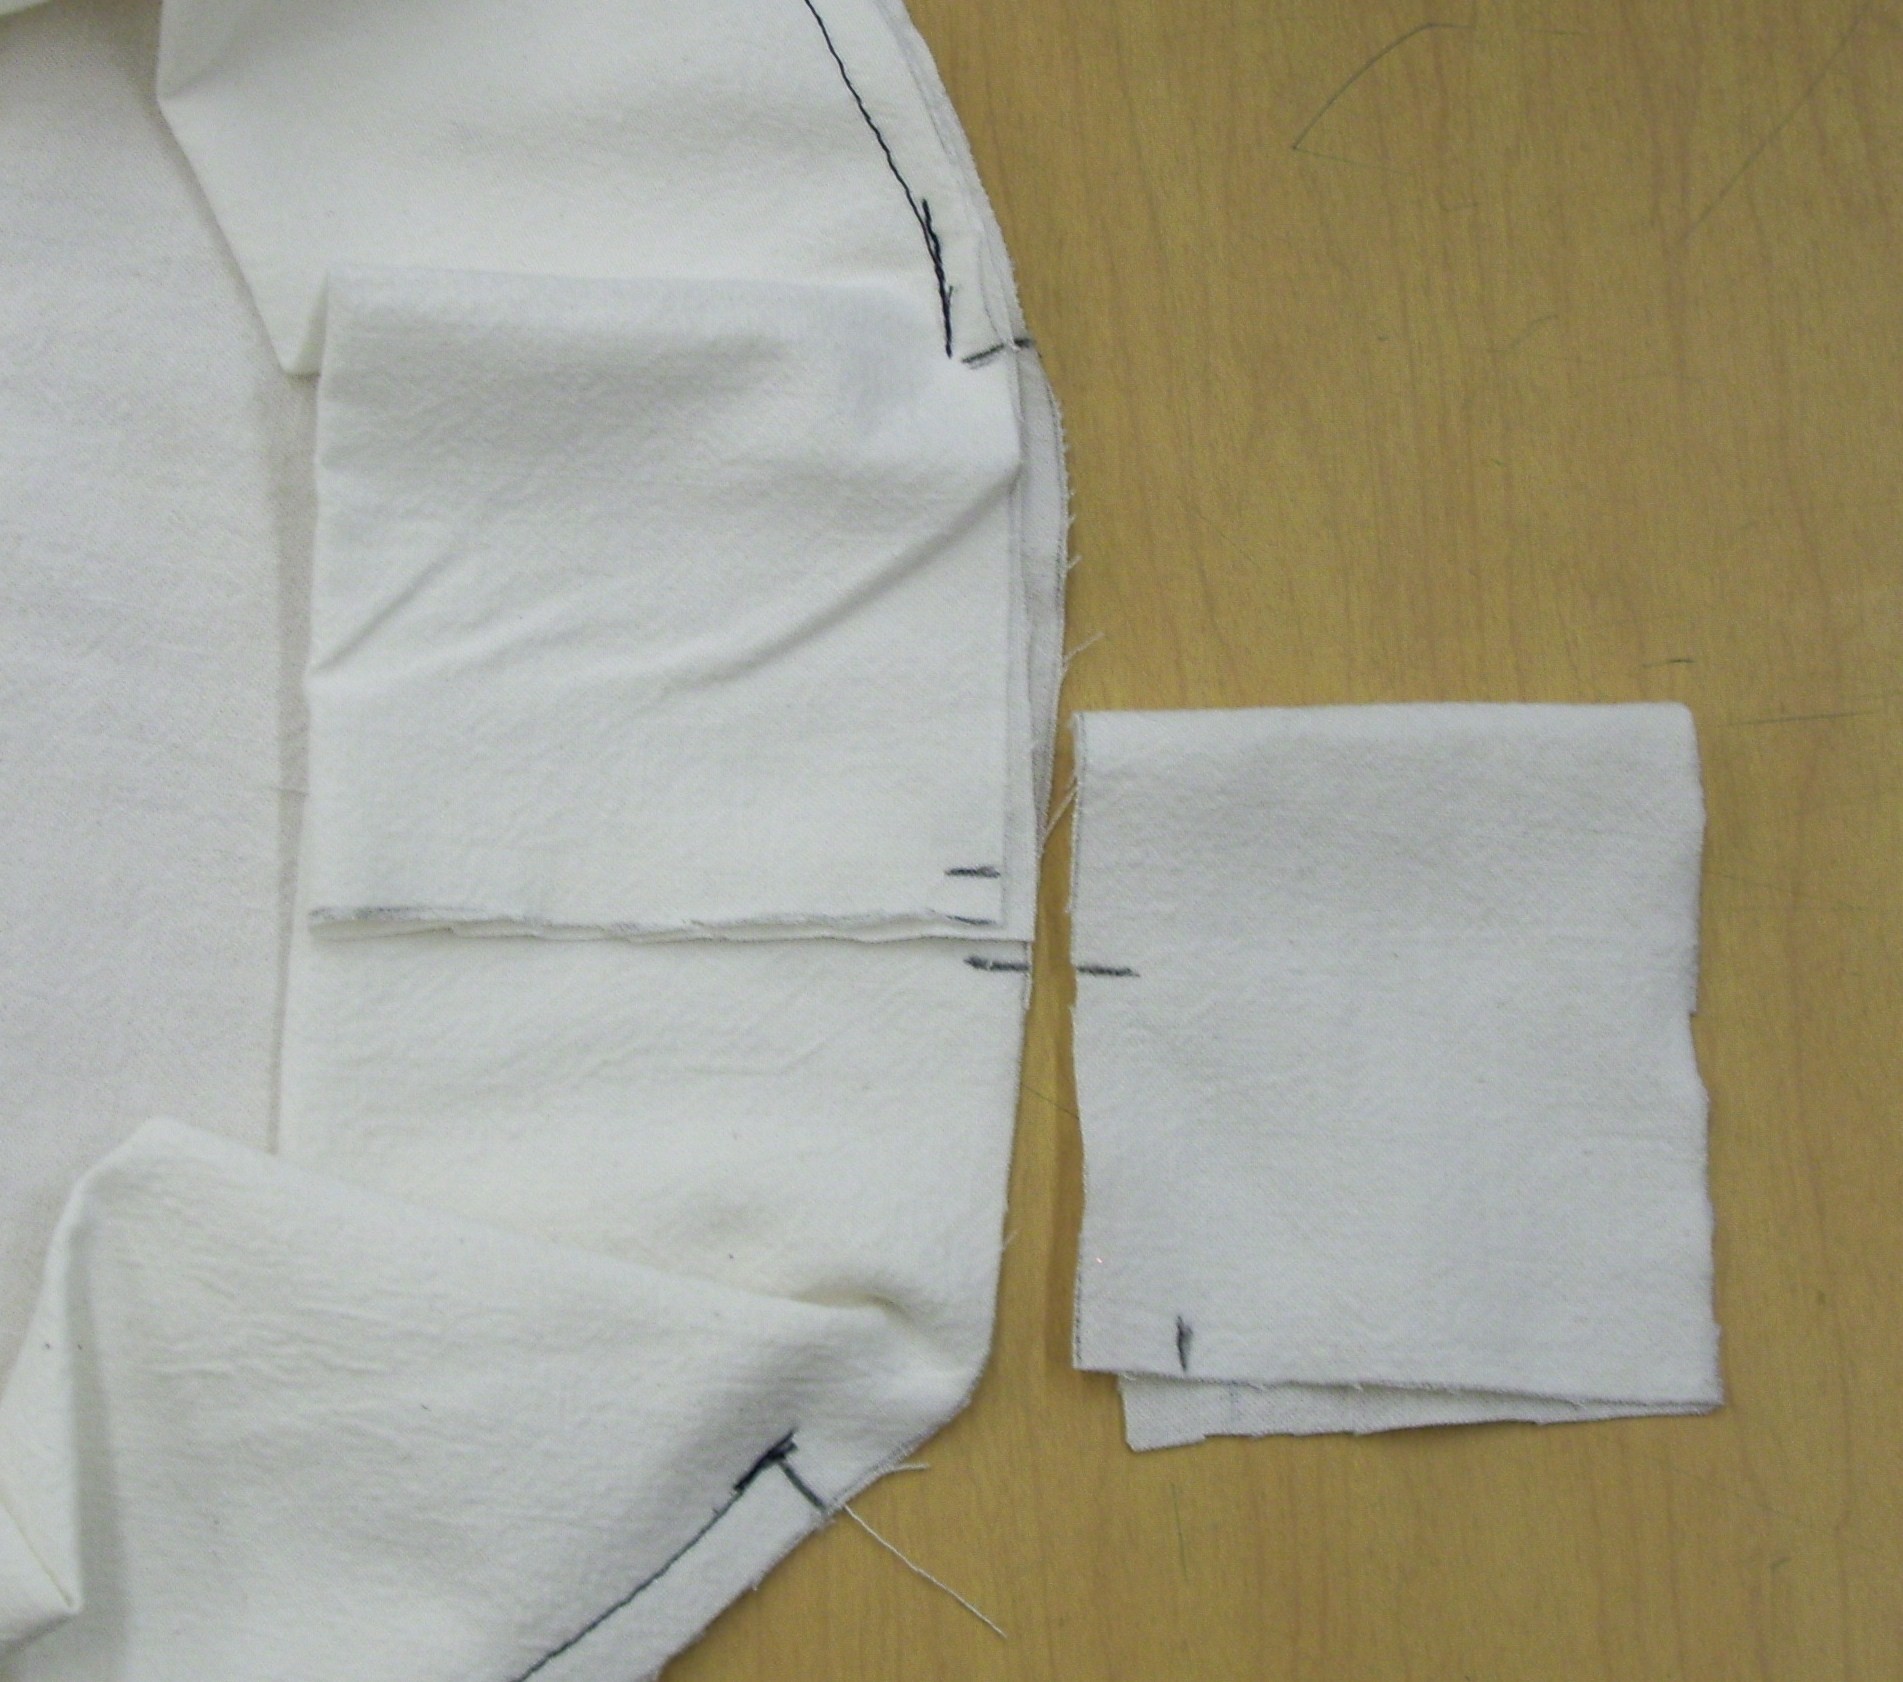
Note: at this point, from where you stopped sewing the rectangle should be too long, that is on purpose.

Step 3
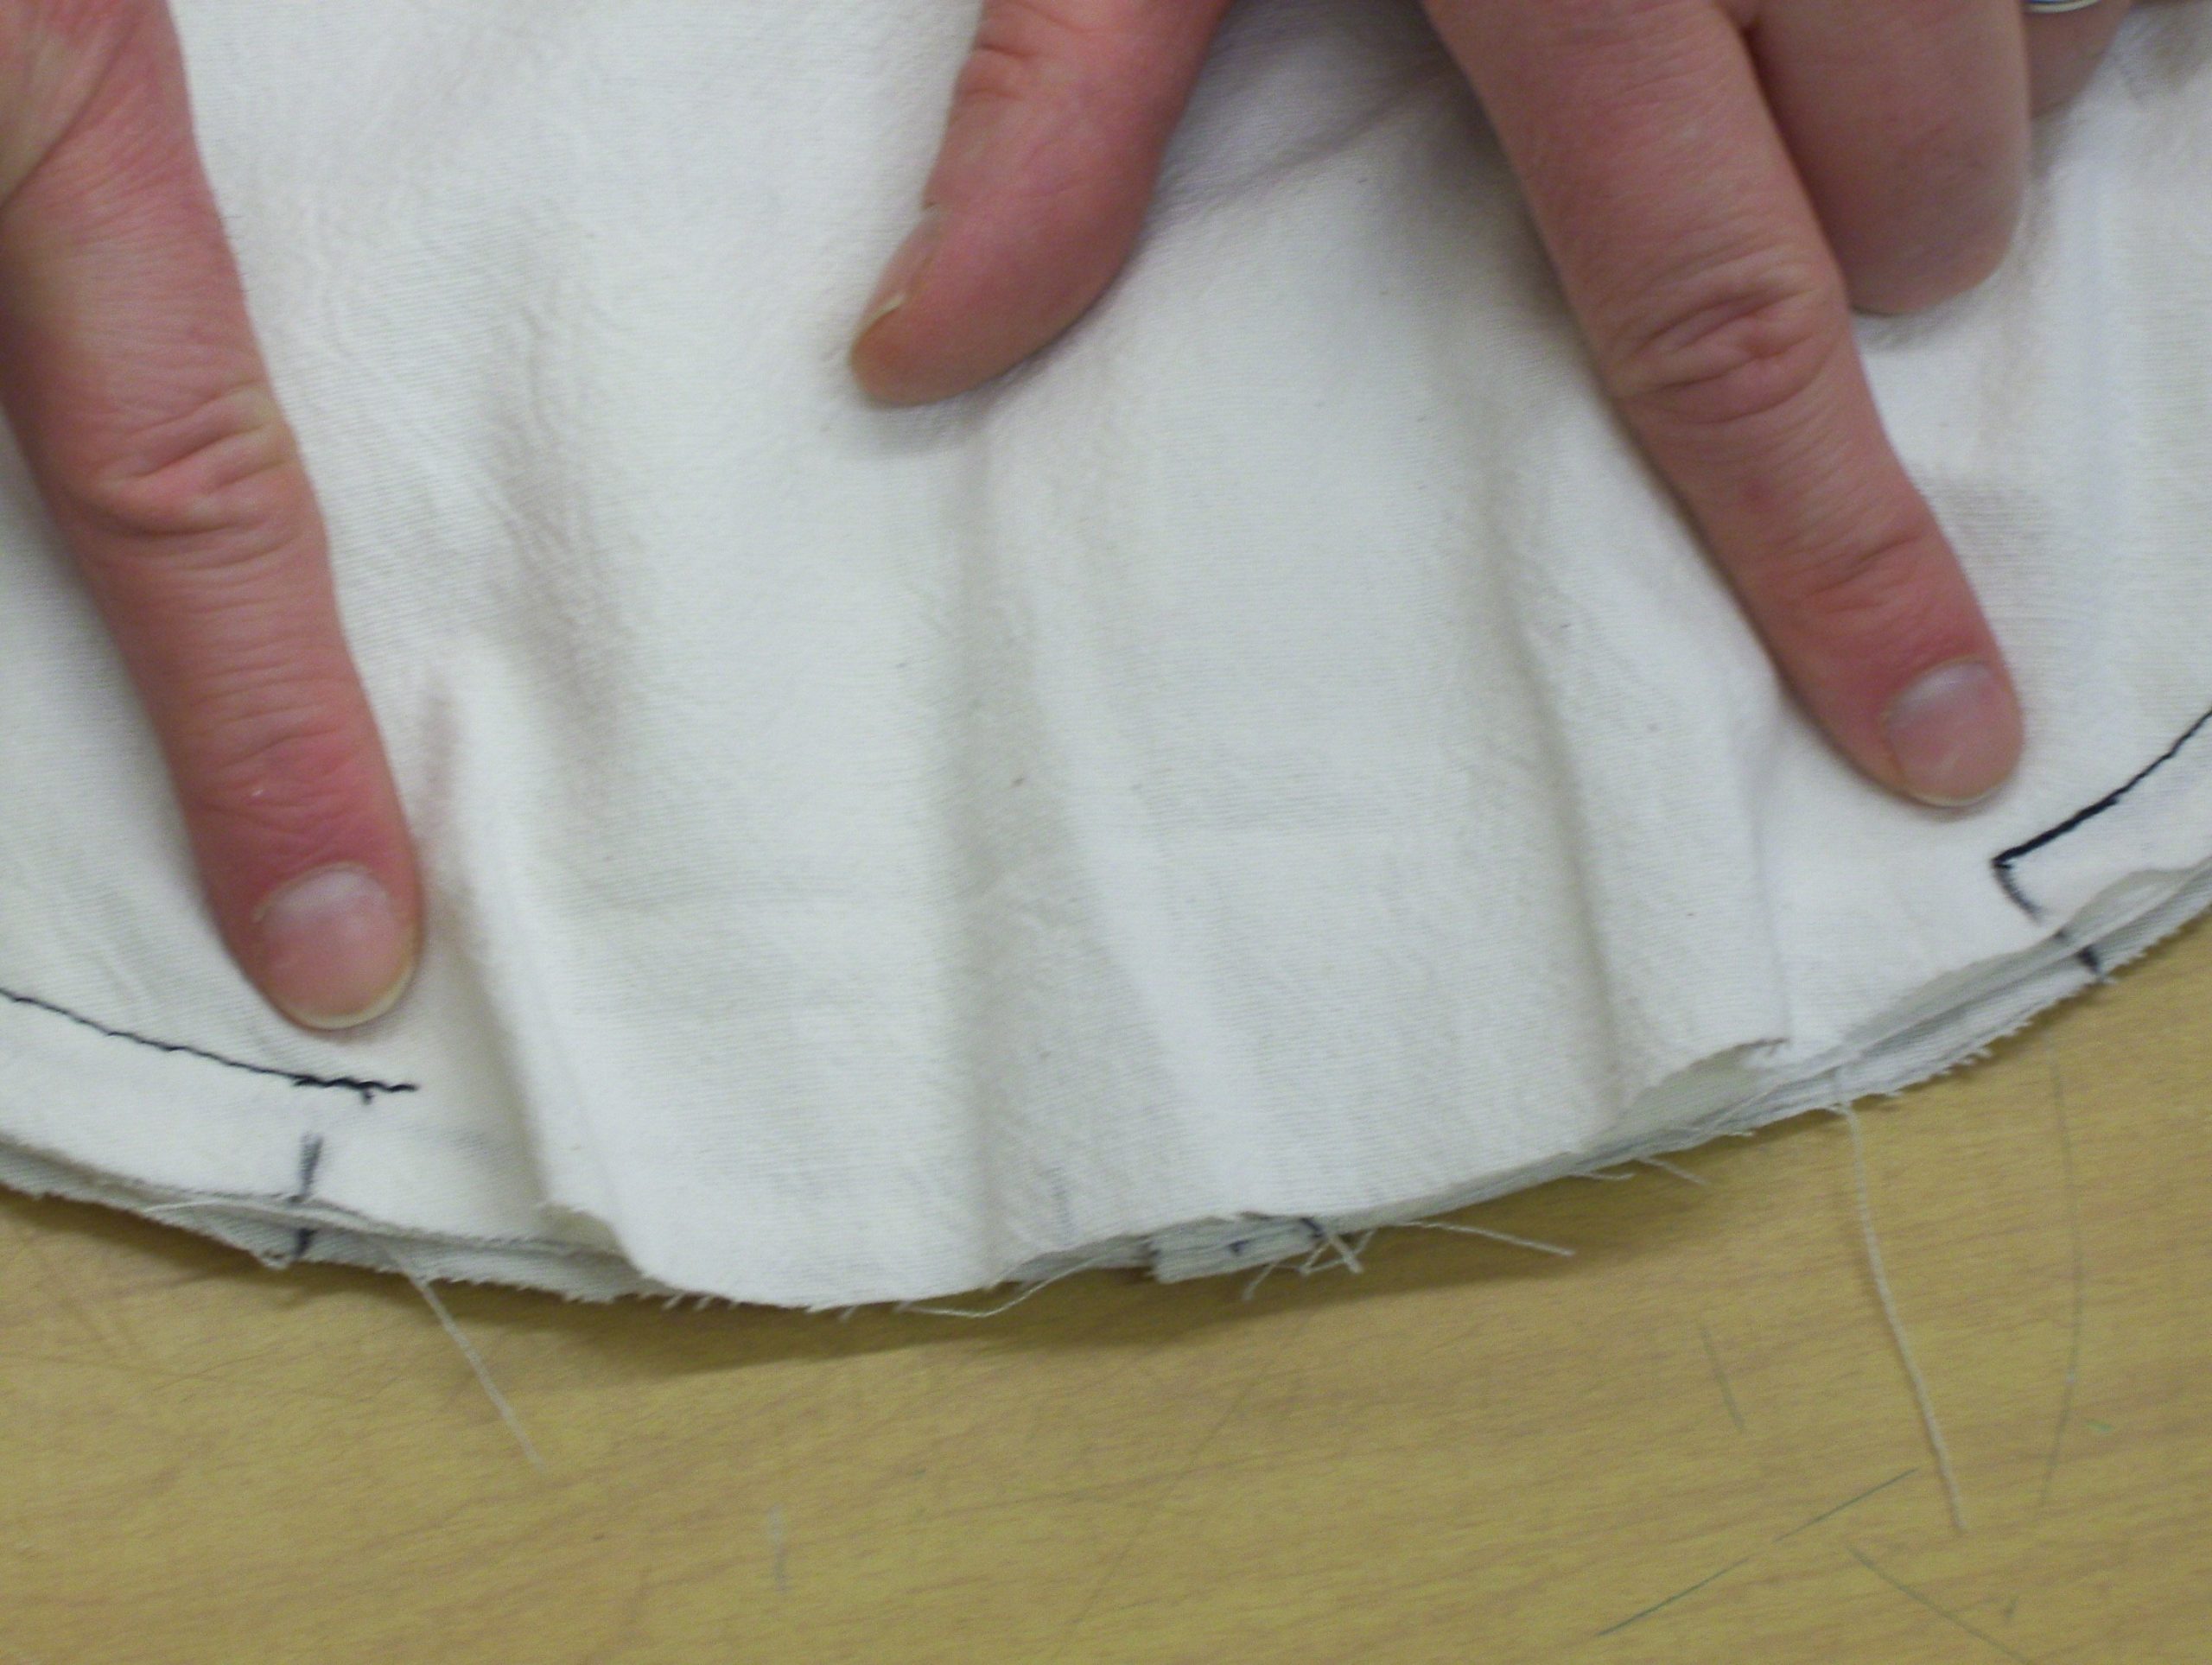
3. From where you stopped sewing Lay out the remainder of the rectangle on top of where you started and remark the longer piece at the ½” notch of the opposite side of the rectangle and cut off the excess with as straight a line as you can, ensure that you have a ½” seam allowance left to attach the two ends of the rectangle together.
Step 4
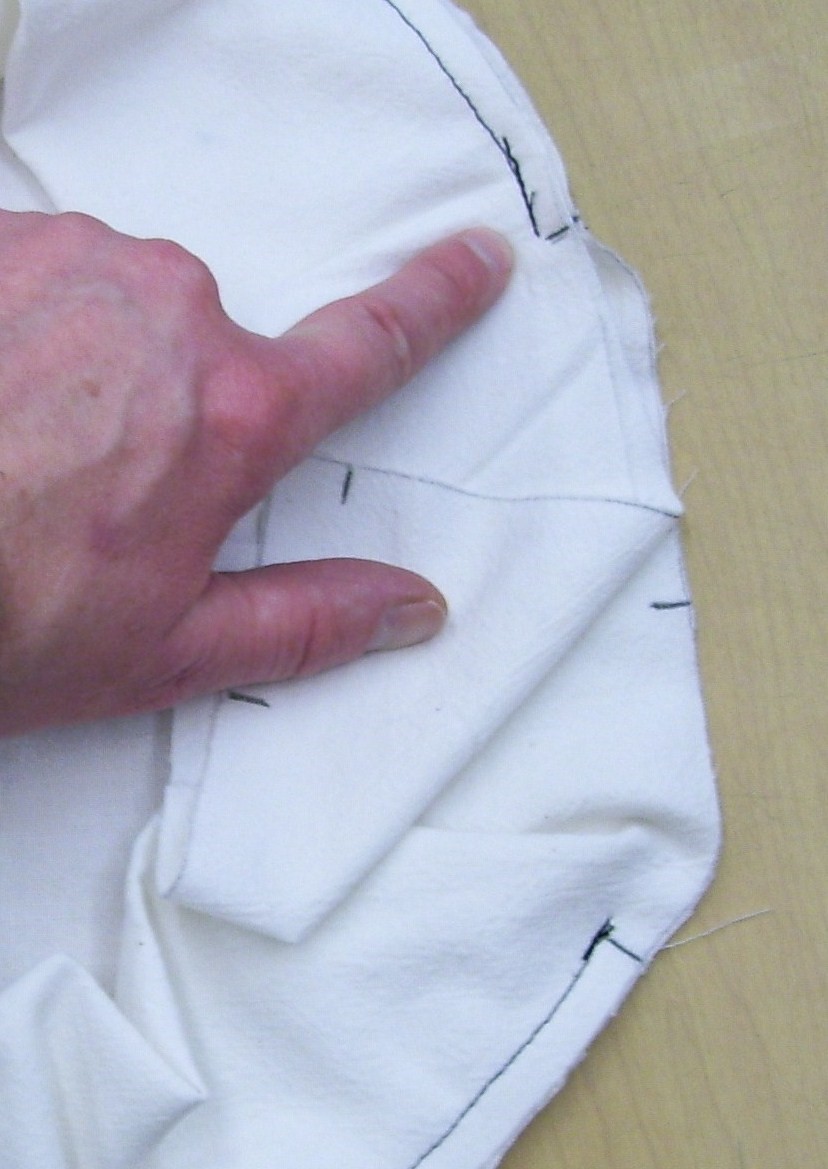
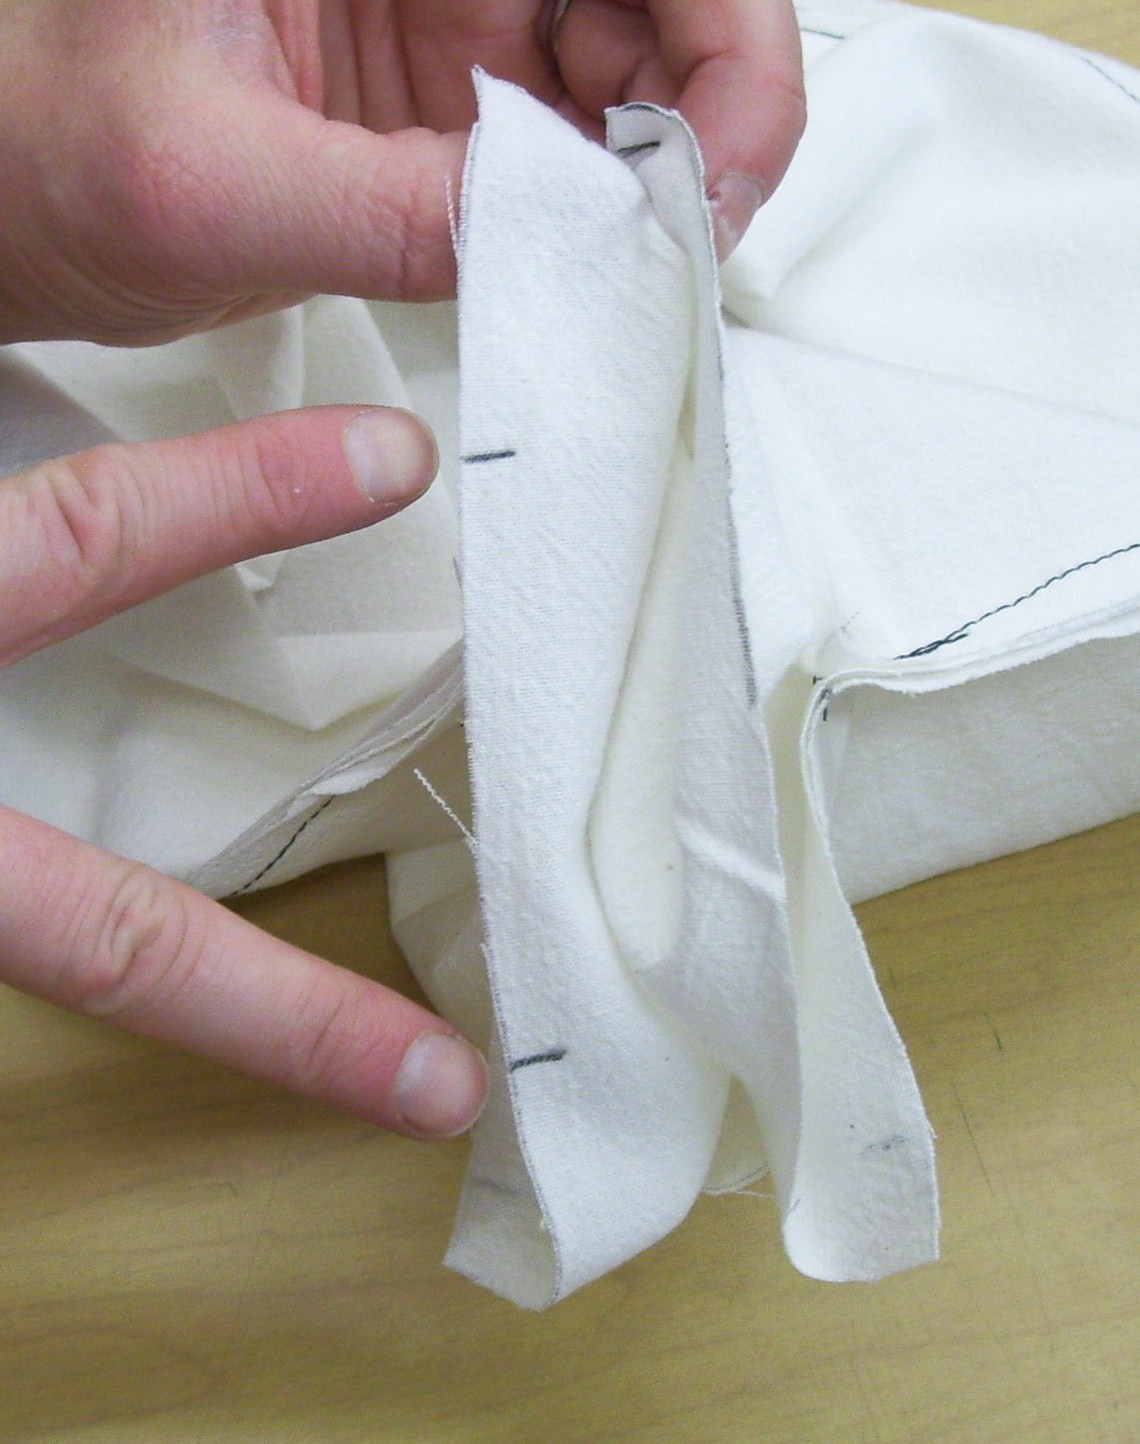
4. Attach the ends of the rectangle together as follows: Note the ends are sewn together in two stages
- Place one pair of ends and sew together from the edge to the notch that is 1 ½” from the edge.
- Sew the other end in the same manner.
- Note: make sure that when you have finished sewing the ends of the rectangle together that you have a gap in the middle and that the rectangle is not twisted.
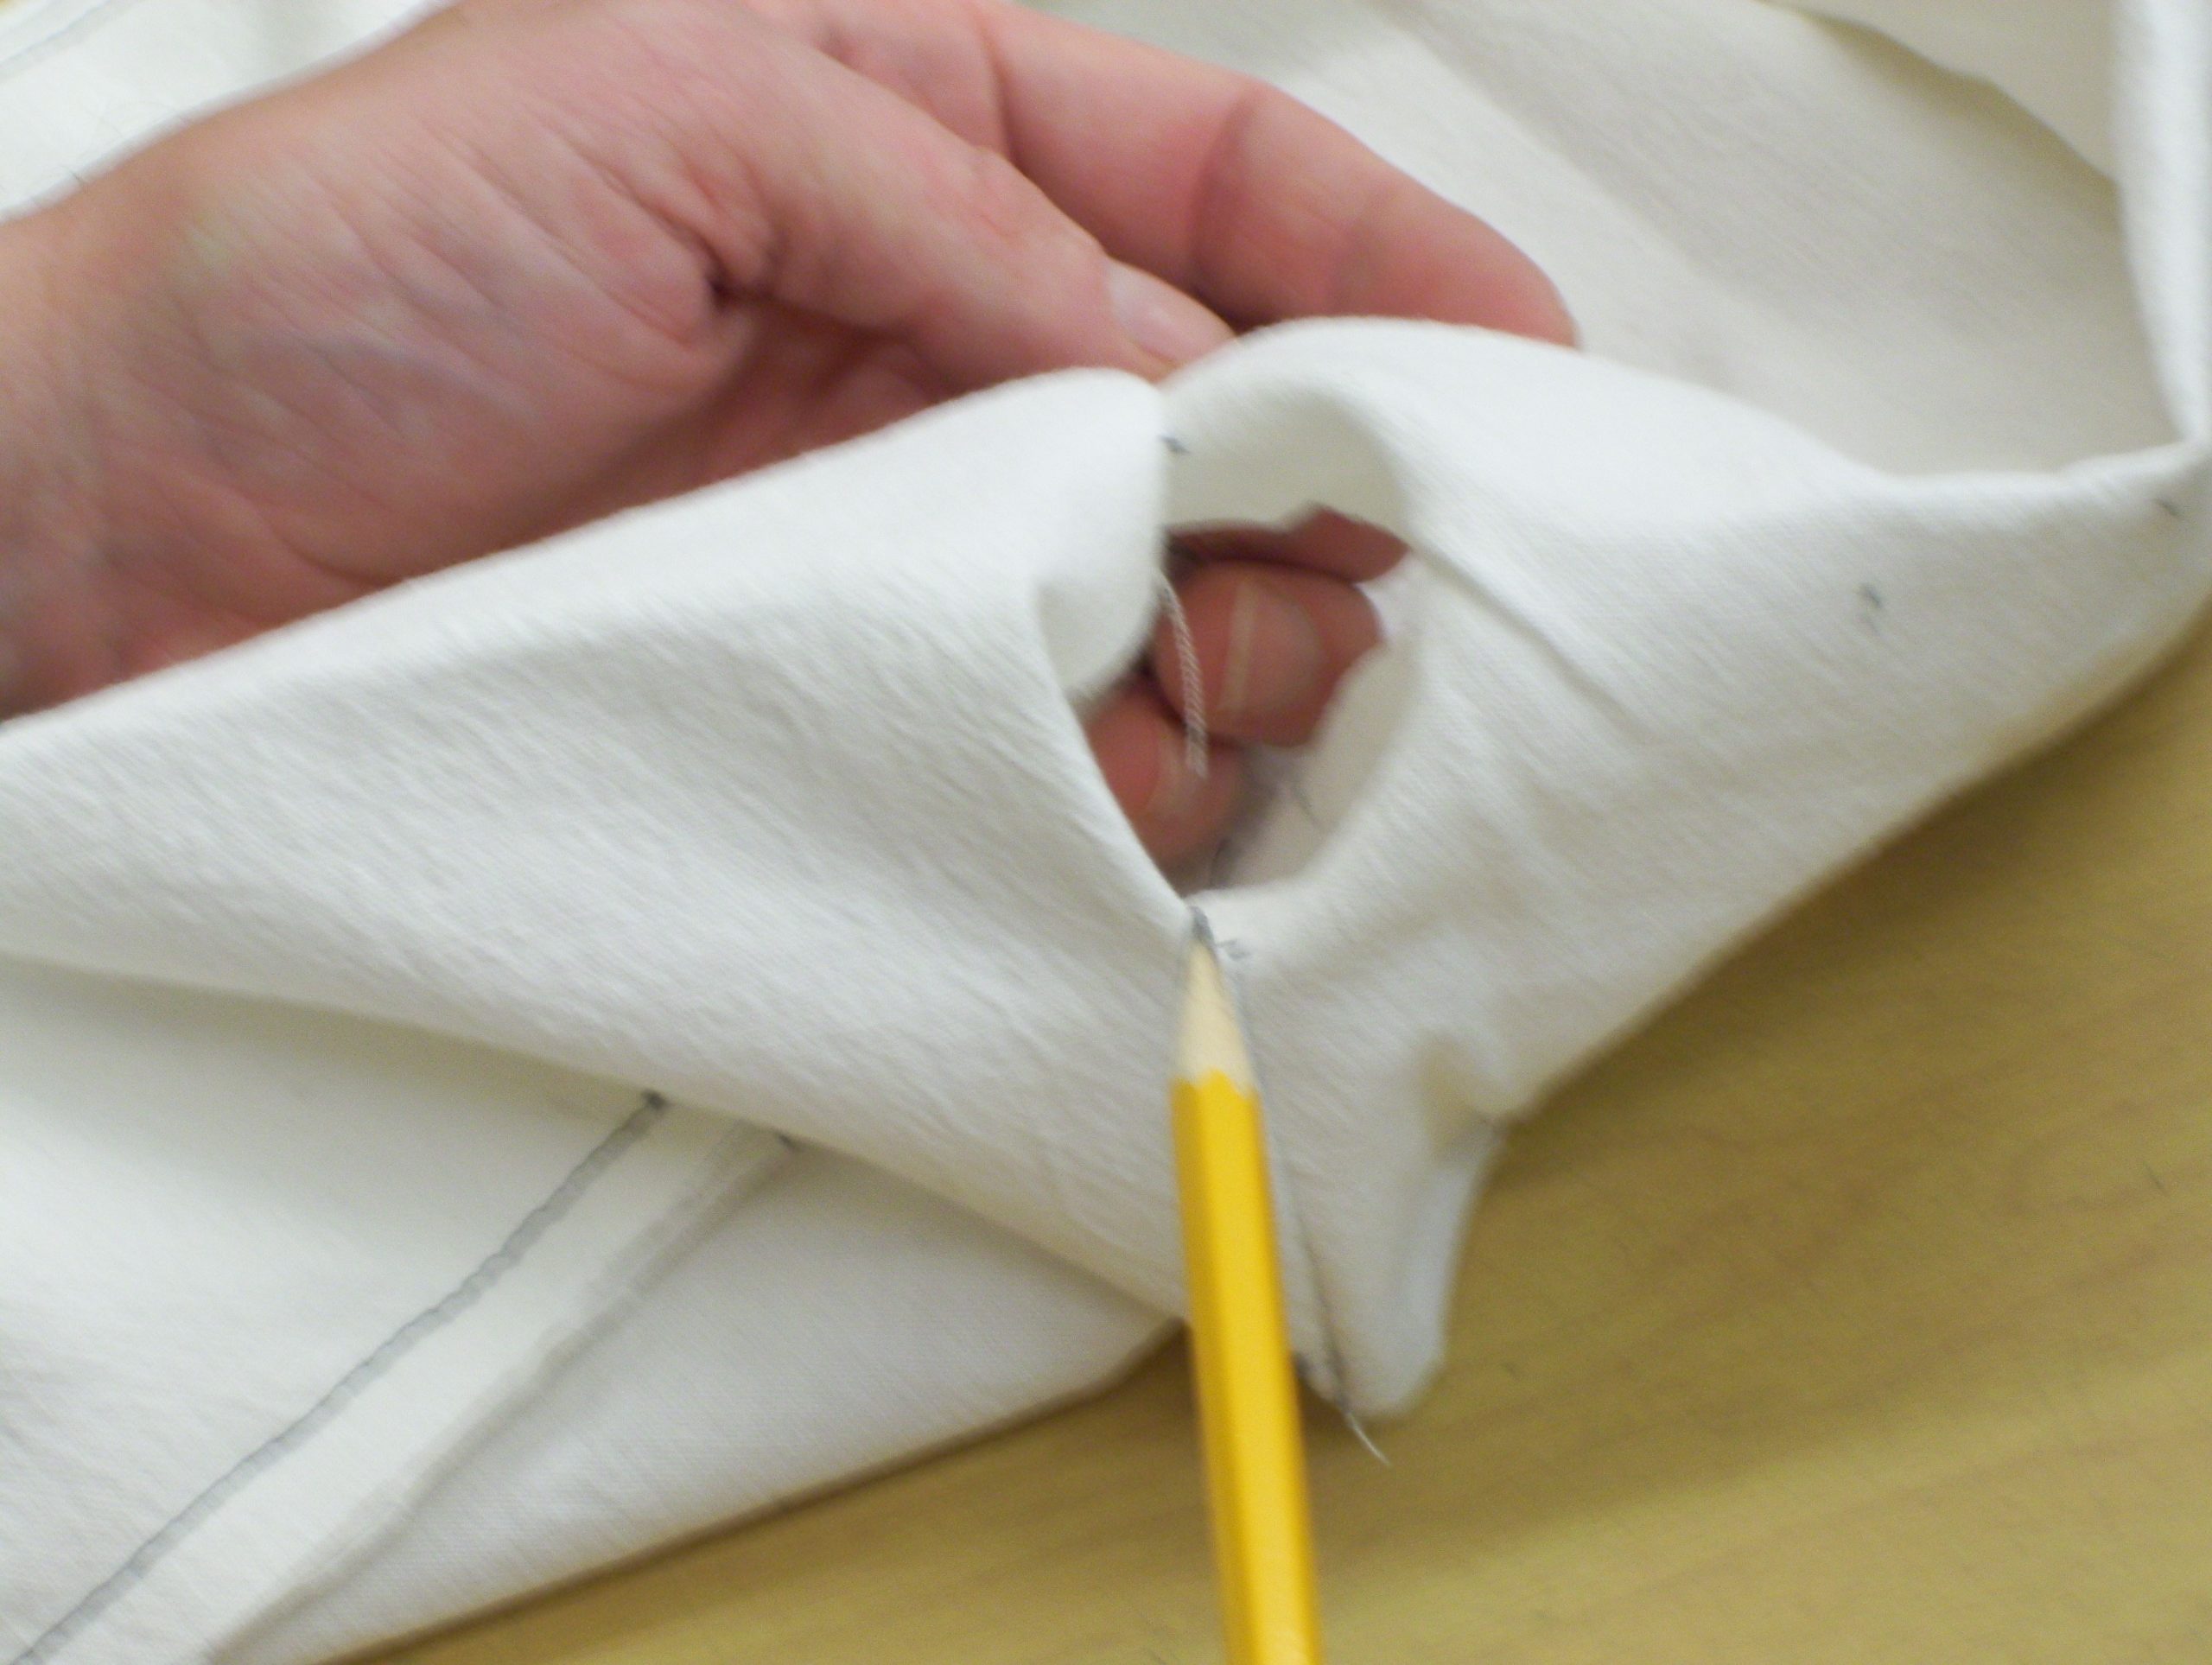
- Once you have the two ends of the rectangle sewed, lay flat on the top oval and finish sewing the rectangle from aprox. 1” from the where you stopped sewing the rectangle to approx. 1” past where you started.
- Make sure the entire rectangle is sewed down.
Step 5
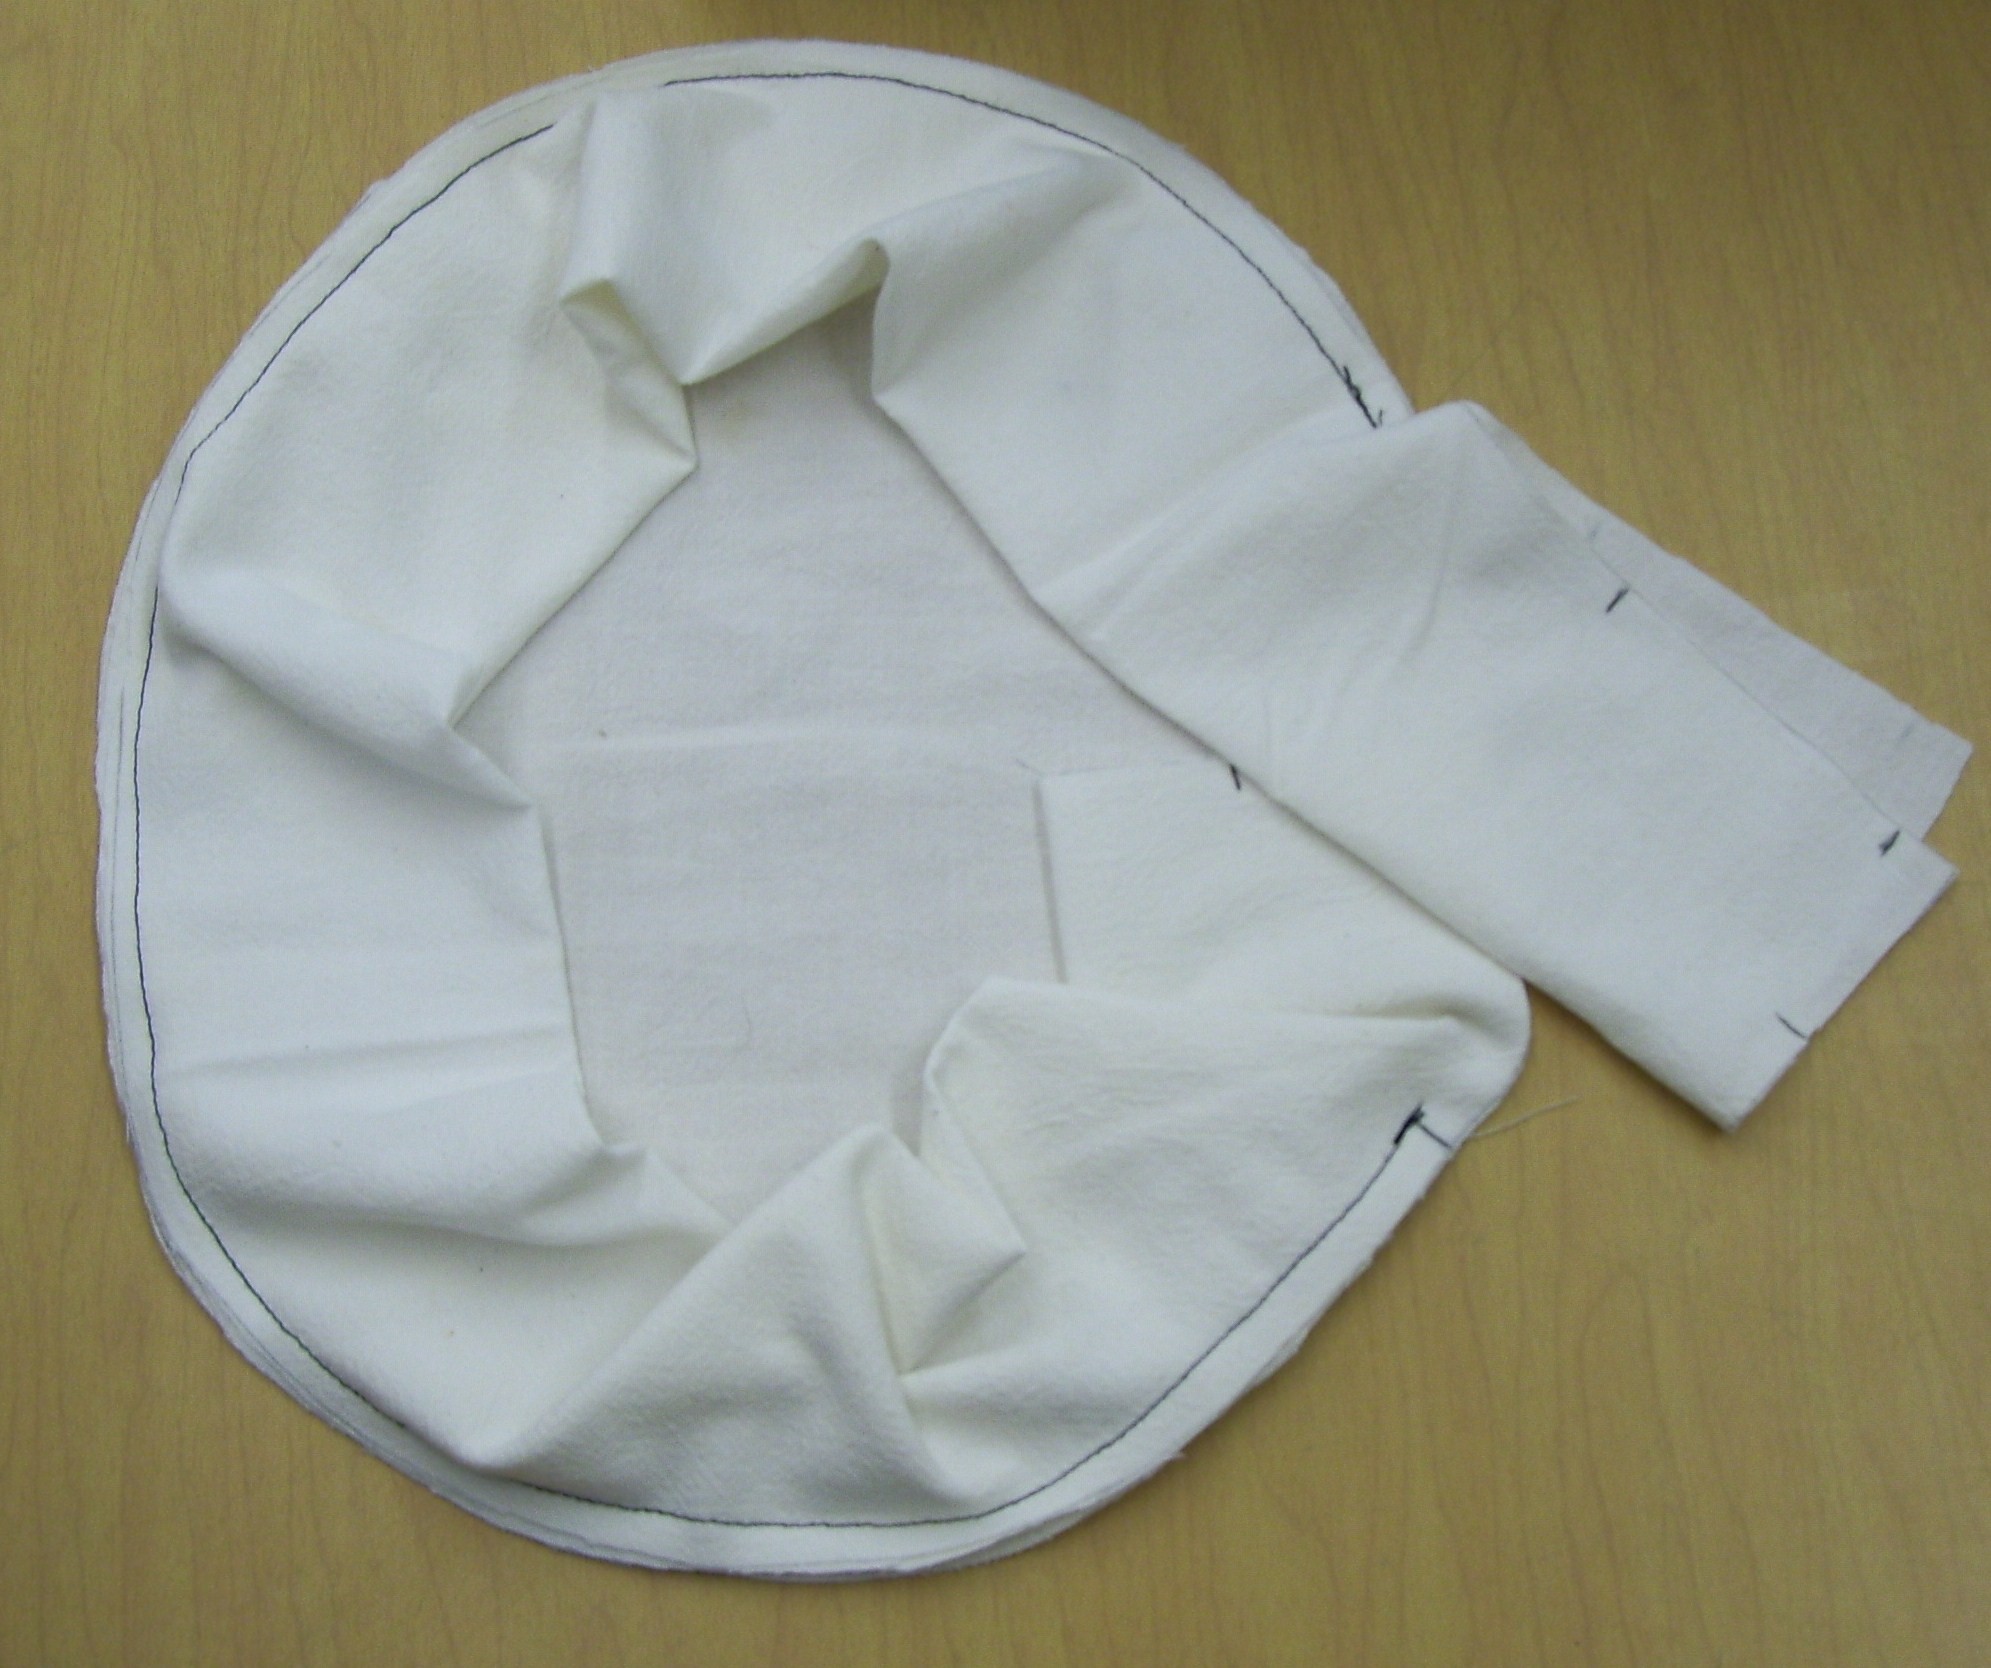
5. Place the oval that is to be the base of the bed on top of the rectangle and top that have already been sewed together and sew together as follows:
- Make sure that both ovals are laying the same way and the notch’s are lined up (as best as you can)
- Start sewing the base at the notch where you started sewing the rectangle to the base but using a ½” seam allowance this time
- Continue sewing until you reach the notch on the oval where you first stopped sewing the rectangle to the top
- Make sure that you leave a gap between where you started sewing and where you stopped
Step 6
6. Once you have finished sewing the base to the rest of the bed remove the bed from the machine and proceed to turn the bed the proper way around.
Step 7
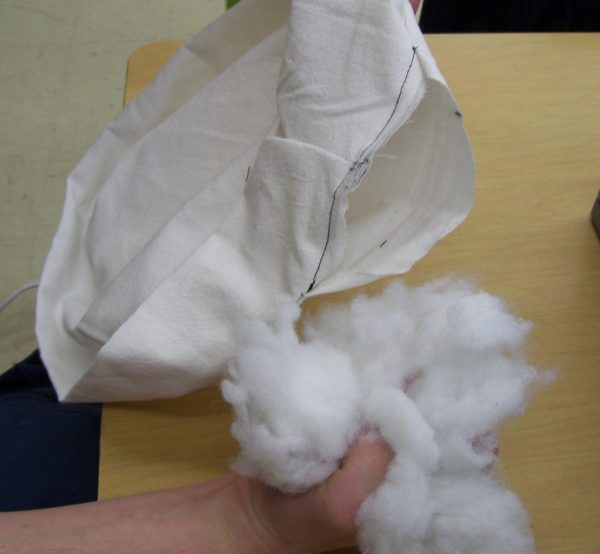
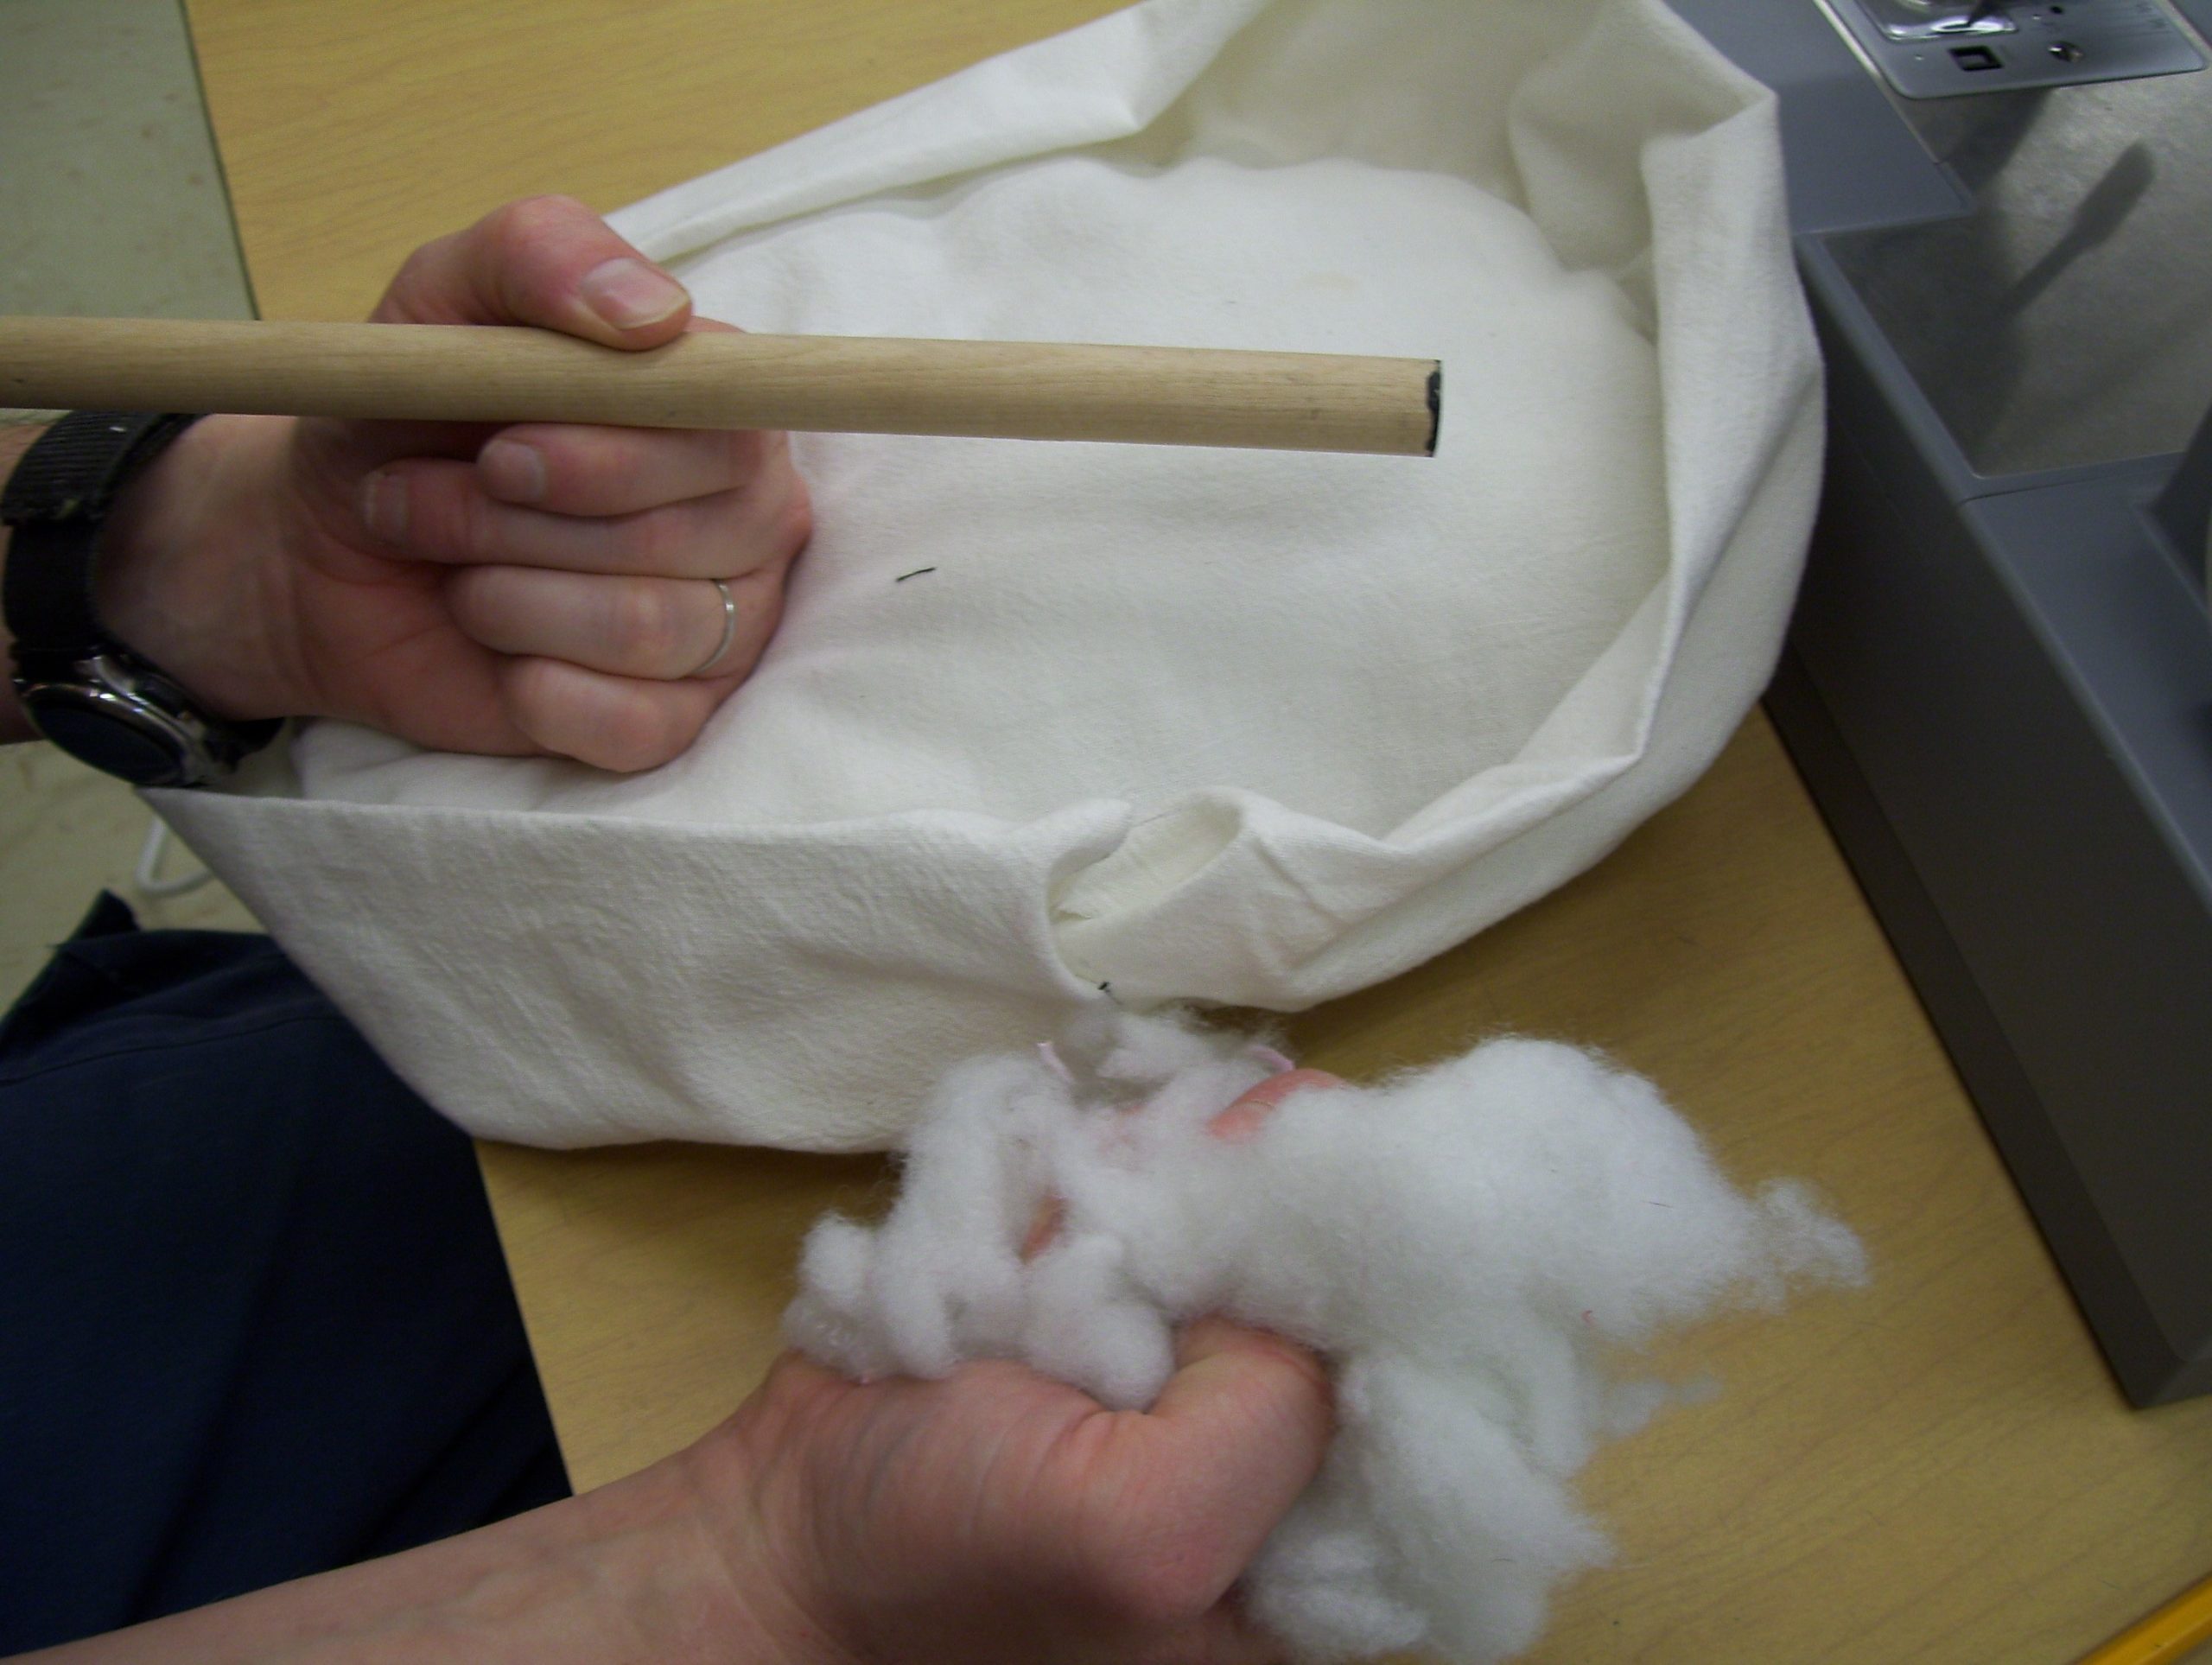
7. When you have flipped the bed, start stuffing the base of it, making it as firm or soft as you wish, it’s up to you.
Step 8
8. With the base stuffed how you like it, you can now close the gap as follows:
- First push the stuffing as far as you can away from the gap.
- Turn the raw edge of the gap to the inside of the bed and sew down as close to the turned edge as you are able to, make sure that you don’t have any raw edge sticking out and that you have covered the original edge.
- Once you have the base sewed simply massage the stuffing back to where you would like it.
Step 9
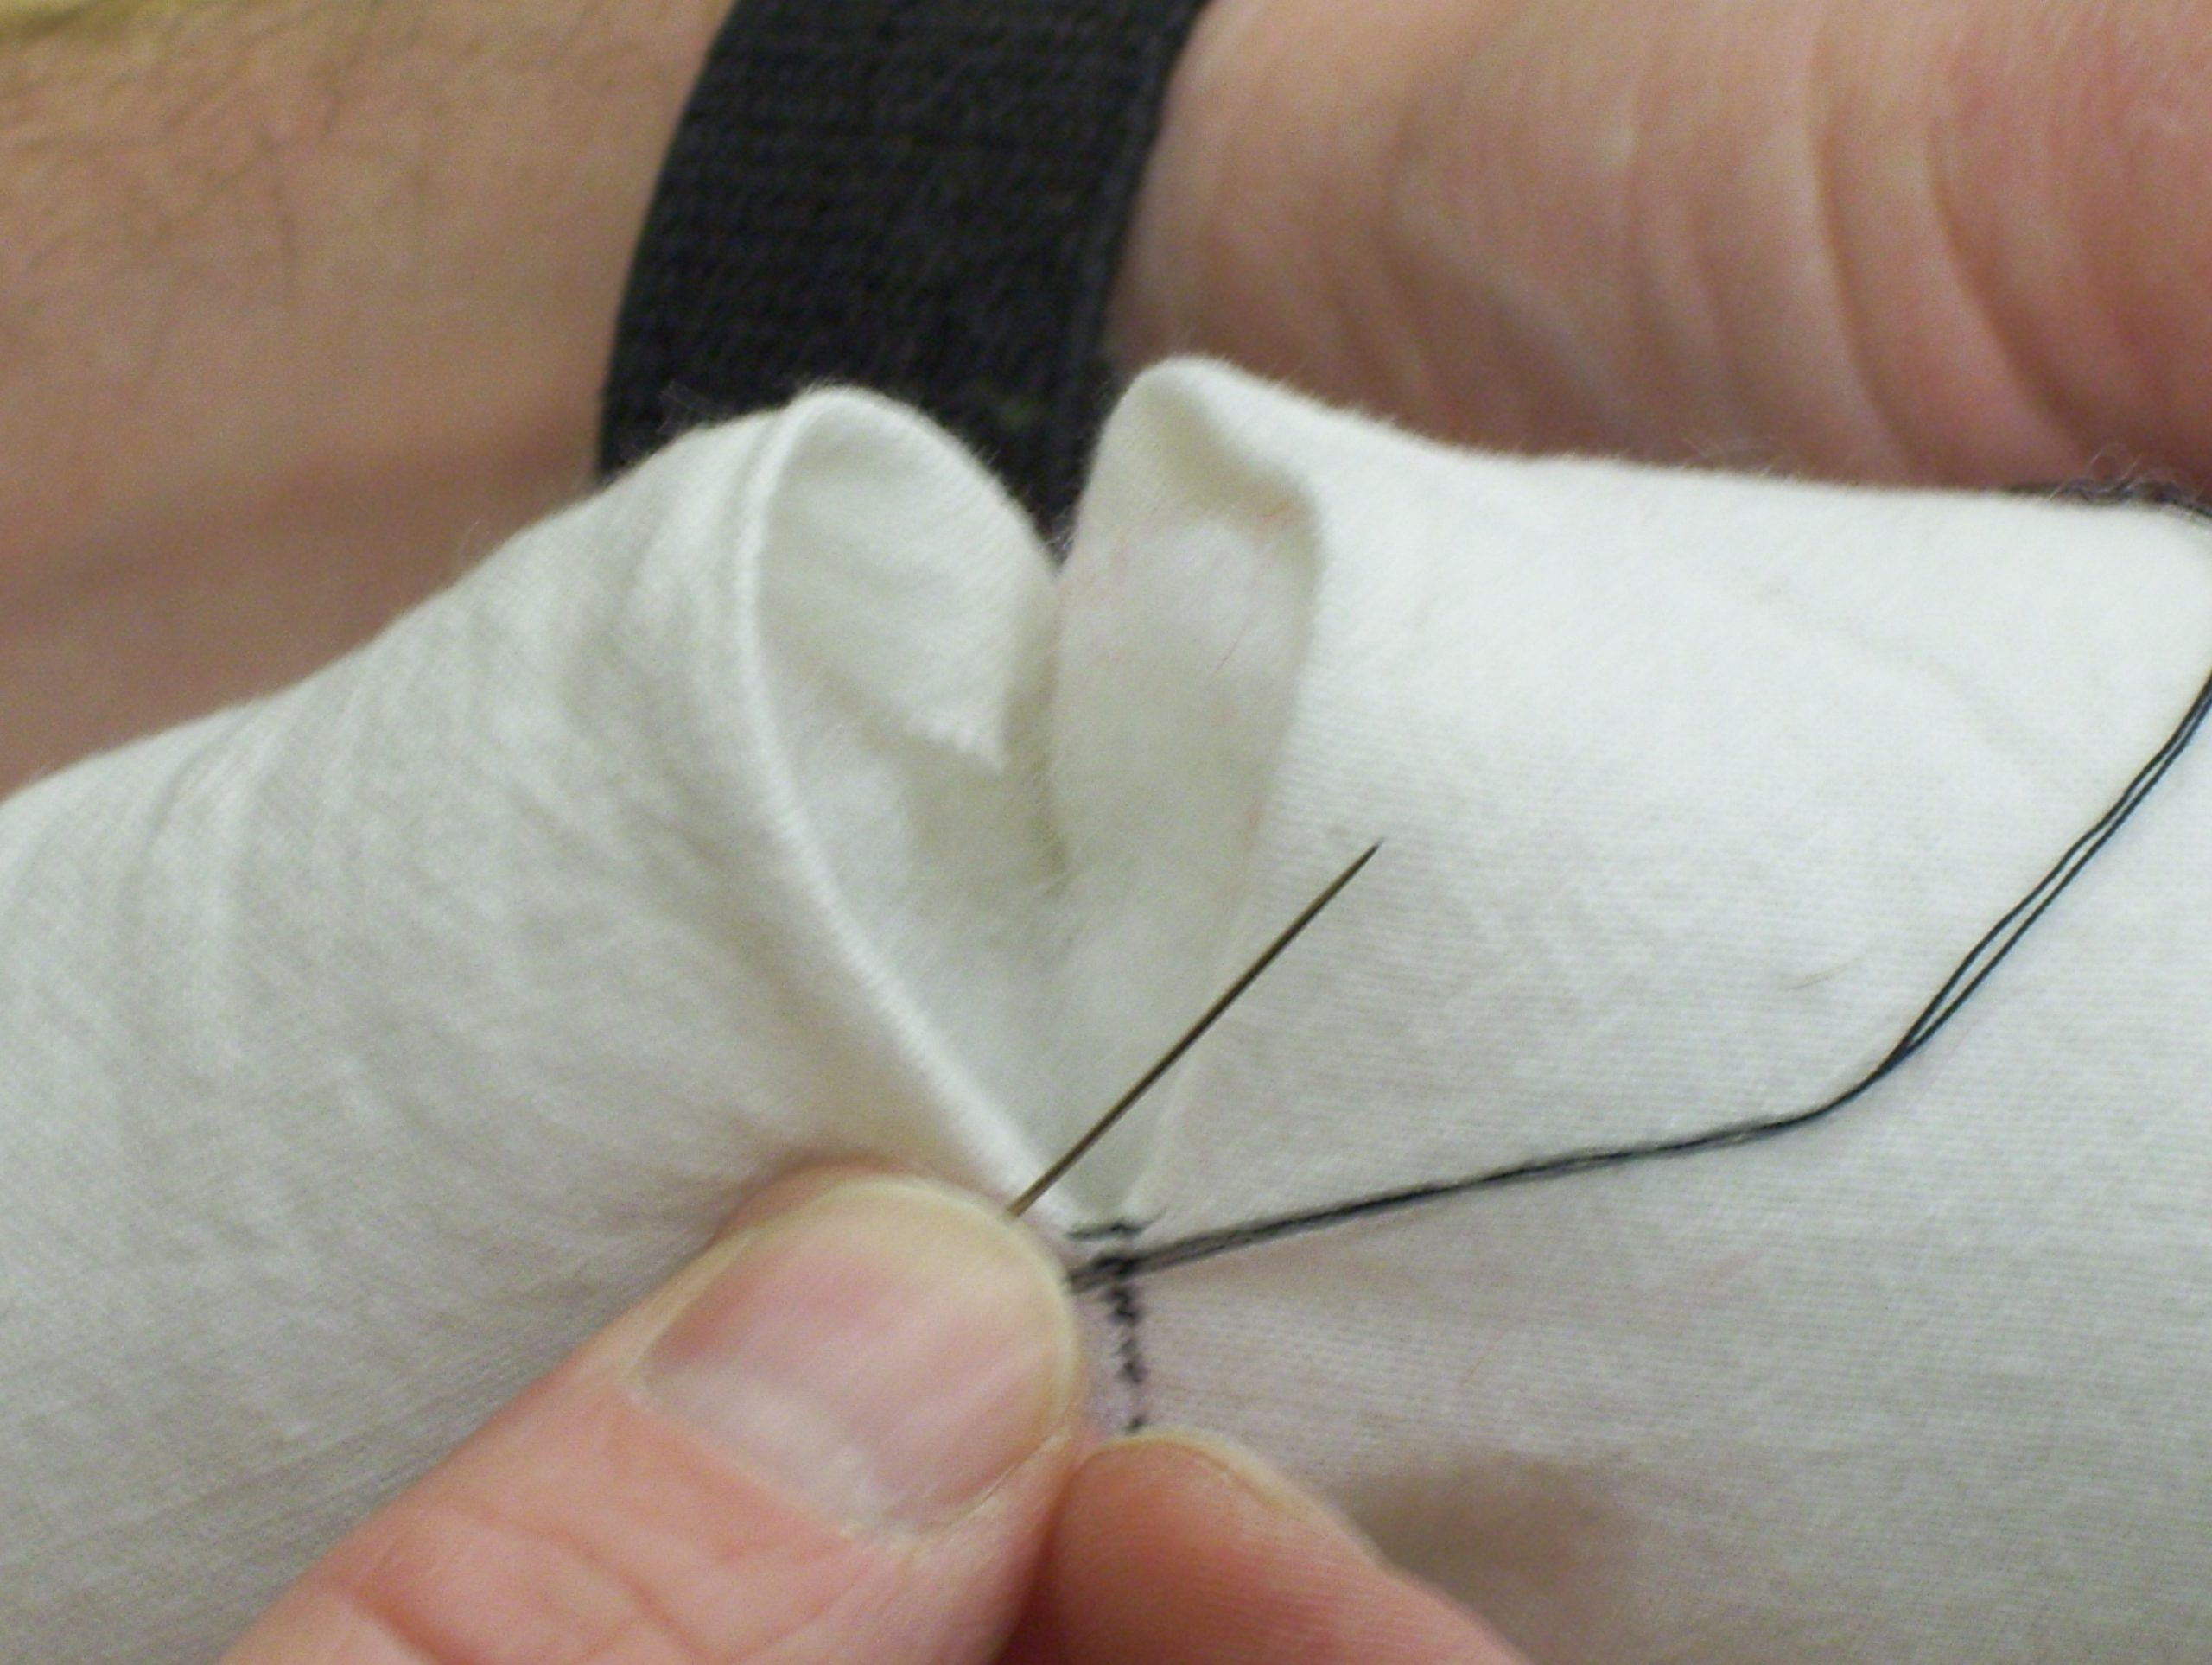
9. Now you have the base the way you want it, stuff the rectangle; again stuff it as hard or soft as you want. Once you have the rectangle the way you want it, close the gap as follows:
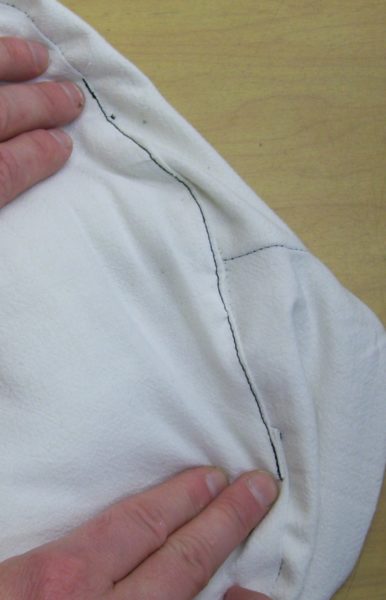
- Turn the raw edges of the gap on the rectangle to the inside
- Pinch the folded ends together and sew together by hand with a simple loop stitch

Step 10
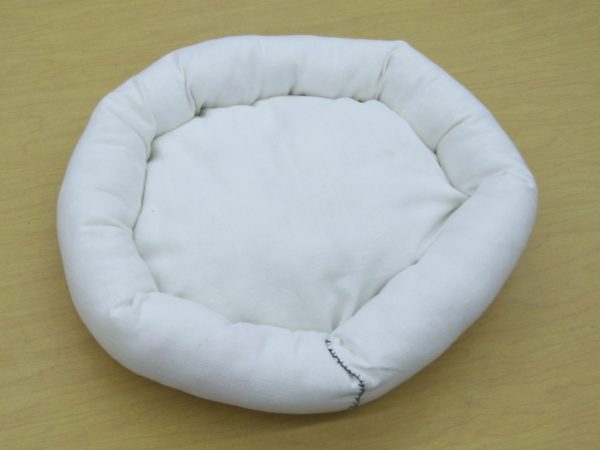
10. That is it, your pet bed is done.